Traditional Granny Throw Crochet Pattern
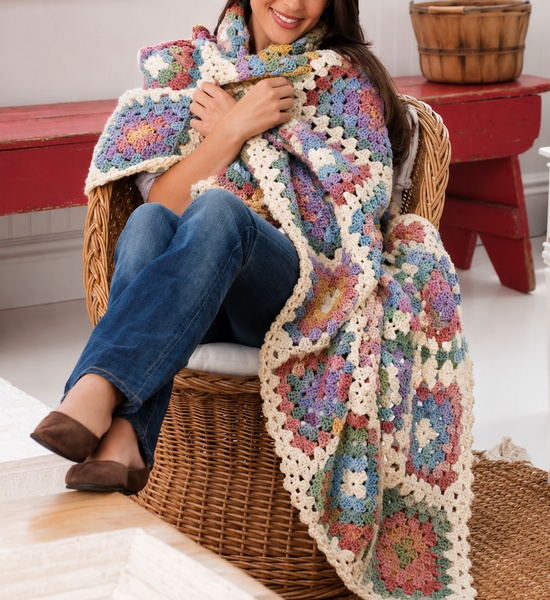
The Traditional Granny Throw is a timeless crochet project that never goes out of style. Featuring the iconic granny square design, this blanket is perfect for beginners looking to build their skills as well as experienced crocheters who enjoy classic patterns. Its colorful squares and customizable layout make it easy to create a throw that reflects your personal style.
Whether you choose bold, vibrant shades or soft, neutral tones, this blanket is sure to become a treasured handmade piece for your home or a thoughtful gift for someone special.
Materials
Before you begin, gather the following supplies:
Crochet Hooks
- 6.0 mm (US J-10)
- 5.5 mm (US I-9) – used only for Round 2 of the border
Yarn
- Red Heart® With Love™ yarn or another worsted-weight yarn in a variety of coordinating colors.
Additional Supplies
- Scissors
- Yarn needle for weaving in ends
Gauge
Checking your gauge will help ensure your finished blanket matches the intended size.
- Rounds 1–2: approximately 3¼ inches (8 cm) in diameter
- Finished square: 8 x 8 inches (20 x 20 cm)
Pattern Notes
- Unless otherwise stated, begin each round with Chain 3, which counts as the first double crochet.
- If preferred, you may replace the starting Chain 3 with your favorite standing beginning double crochet.
- Fasten off after each round when instructed and join the next color with the right side of the square facing you.
Color Layout
Make seven squares using each of the following color sequences:
- Square 1: E, C, D, G, B
- Square 2: D, B, F, C, E
- Square 3: F, E, D, B, C
- Square 4: B, G, C, E, F
- Square 5: C, D, E, B, G
- Square 6: G, F, B, C, D
Feel free to substitute your favorite color palette to create a throw that perfectly suits your décor.
Granny Square Instructions
Round 1
Using the first color and the 6.0 mm hook, chain 4 and join with a slip stitch to form a ring.
- Chain 3 (counts as first double crochet).
- Work 2 double crochets into the ring.
- Chain 2.
- Repeat (3 double crochets, chain 2) three more times.
- Join with a slip stitch to the top of the beginning chain.
You should now have:
- 12 double crochets
- 4 corner chain-2 spaces
Fasten off.
Round 2
Join the second color in any corner chain-2 space.
- Chain 3.
- Work (2 double crochets, chain 2, 3 double crochets) in the same corner.
- Chain 1.
- Repeat (3 double crochets, chain 2, 3 double crochets) in each remaining corner, separated by Chain 1.
- Join with a slip stitch.
You should have:
- 24 double crochets
- 4 corner spaces
- 4 chain-1 spaces
Fasten off.
Round 3
Join the third color in any chain-1 space.
- Chain 3 and work 2 double crochets in the same space.
- Chain 1.
- Work (3 double crochets, chain 2, 3 double crochets) in the next corner.
- Continue working groups of 3 double crochets into each chain-1 space and the corner pattern into every corner.
- Join with a slip stitch.
Finished Round 3:
- 36 double crochets
- 4 corner spaces
- 8 chain-1 spaces
Fasten off.
Round 4
Join the fourth color in the first chain-1 space to the left of any corner.
Continue the established granny square pattern:
- 3-double crochet groups in each chain-1 space
- (3 double crochets, chain 2, 3 double crochets) in every corner
When complete, you’ll have:
- 48 double crochets
- 4 corner spaces
- 12 chain-1 spaces
Fasten off.
Round 5
Join the fifth color in the first chain-1 space beside any corner.
Continue adding granny clusters across each side while maintaining the same corner construction.
Finished Round 5:
- 60 double crochets
- 4 corner spaces
- 16 chain-1 spaces
Fasten off.
Round 6
Join Color A in the first chain-1 space to the left of a corner.
Work another round of granny clusters, but replace each corner with:
(3 double crochets, chain 4, 3 double crochets)
When finished, your square should contain:
- 72 double crochets
- 4 chain-4 corner spaces
- 20 chain-1 spaces
Fasten off.
Joining the Squares
There are two popular ways to assemble your blanket.
Option 1: Sew the Squares
Complete all squares through Round 6.
Arrange them according to your desired layout, then whipstitch the squares together through the back loops for a neat, almost invisible seam.
Option 2: Join as You Crochet
Complete each square through Round 5.
Arrange the squares before beginning Round 6, then join neighboring squares as you crochet the final round. This method creates a seamless finish and eliminates most of the sewing.
Joining Round for Additional Squares
For every square after the first, work Round 6 as usual while joining it to the completed neighboring squares.
As you crochet:
- Join the chain-4 corner spaces where needed.
- Connect the center stitch of each granny cluster to the matching stitch on the adjacent square.
- Join the chain-1 spaces as instructed.
- Where four corners meet, follow the corner joining sequence to create a smooth intersection.
Continue until every square has been attached.
Border
Border Round 1
Using Color A and the 6.0 mm hook, join the yarn in any chain-1 space.
Work granny clusters evenly around the entire blanket.
At every corner, crochet:
(3 double crochets, chain 4, 3 double crochets)
Join with a slip stitch to finish the round.
Border Round 2
Switch to the 5.5 mm hook.
This decorative edging uses slip stitches, single crochet, and small chain loops to create a delicate finish.
Work around the blanket following the established stitch pattern, making sure to crochet the decorative corner sequence into each chain-4 corner.
Fasten off and weave in all remaining yarn ends.
Finishing
Once the border is complete:
- Weave in all loose ends securely.
- Block the blanket if desired for crisp edges and an even finish.
- Enjoy your beautiful handmade Traditional Granny Throw or wrap it up as a heartfelt handmade gift.
Final Thoughts
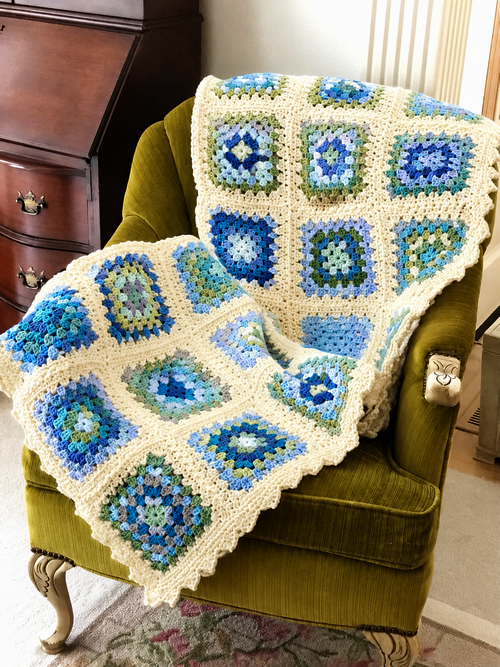
The Traditional Granny Throw is a wonderful project that celebrates one of crochet’s most beloved motifs. Its simple construction, endless color possibilities, and timeless appeal make it a relaxing project you’ll enjoy creating from start to finish. Whether displayed on a sofa, layered across a bed, or gifted to someone you love, this classic granny square blanket is sure to be treasured for years to come.
Happy crocheting!