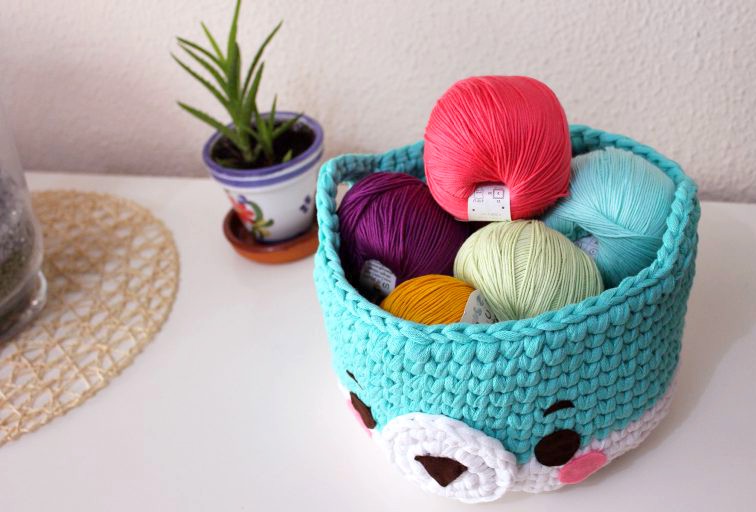
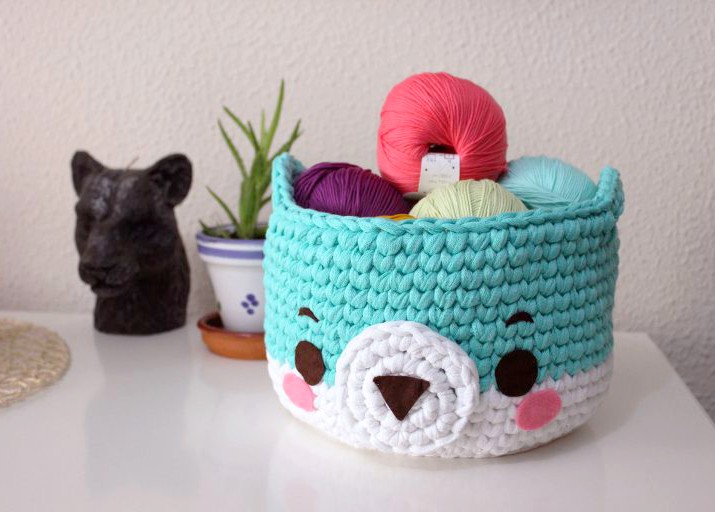
I’m bringing you a very special pattern since it’s my first rag pattern, and I think the result is a very cute and kawaii teddy bear basket. My idea when making it was to be the perfect accessory for our newborn gifts. We could put in a cuddle blanket, some booties (I’ll show you how to make them very soon), and a matching amigurumi. Then we could add baby cologne or some other hygiene product, and we’d have a perfect basket to give as a gift. Anyway, in these photos, I’m showing you how it would look to organize our yarn, although we can use it for whatever we want.
So, let’s get started with the important stuff. On with the pattern!
To crochet this teddy bear basket, you will need:
8 mm crochet hook
Felt (for the eyes)
Ultralight teddy: mint and white (1 ball of each color)
Pins
Yarn needle
Row marker
Knitting glue or hot glue
Base
The base is round, and we will use white teddy.
R1: Make a magic ring of 8 single crochet stitches (8)
R2: 1 increase in each stitch of the round (16)
R3: 1 sc, 1 increase (repeat to the end of the round) (24)
R4: 2 sc, 1 increase (repeat to the end of the round) (32)
R5: 3 sc, 1 increase (repeat to the end of the round) (40)
R6: 4 sc, 1 increase (repeat to the end of the round) (48)
R7: 5 sc, 1 inc (repeat to the end of the row) (56)
Vertical Section
We’ve now finished the base of our rag basket, now we move on to knitting the vertical section. I tried a method I found on Pinterest and liked it. An alternative to the instructions below is to make a row by passing the needle only through the back loop of the stitch.
Let’s place our base face down and pick up the strand indicated in the photo to make a row of single crochets.
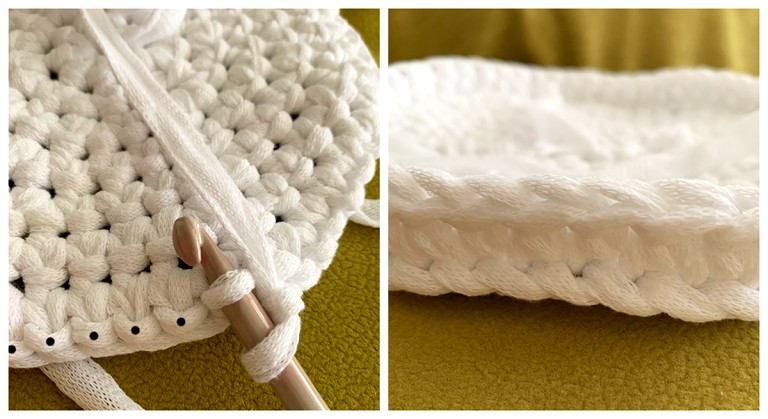
We continue using the white rag basket.
R1: 1 single crochet in each stitch, picking up the strand shown in the photo above (56)
R2-6: 1 centered single crochet* in each stitch of the row (56)
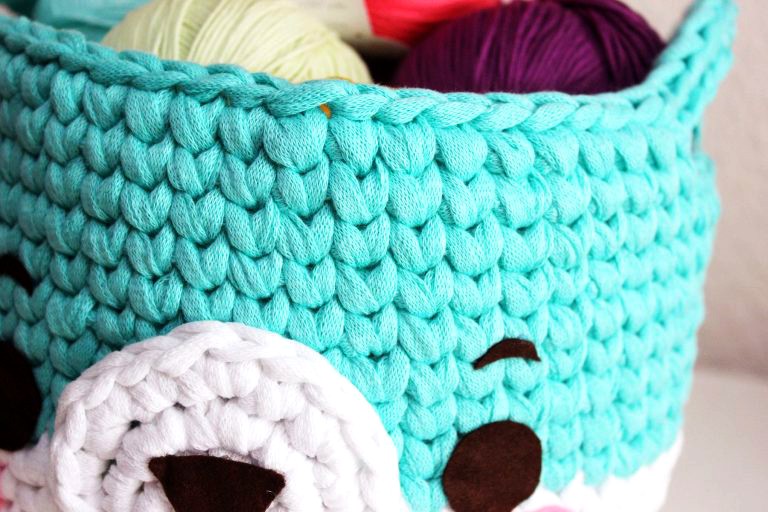
*On these rows, we’ll continue making single crochets, but we won’t insert the needle where we normally would to make our project. This time, we’re going to make centered single crochets, that is, we’re going to insert the hook through the center of the stitch, the “herringbone.” In the photos below, you can see exactly where to insert the hook so you understand it better.
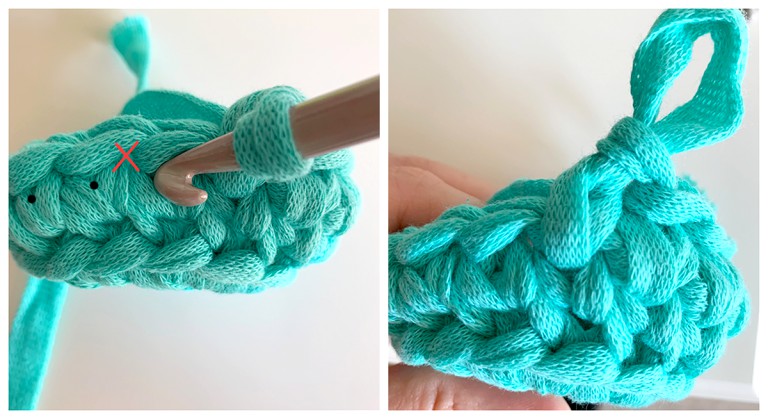
This stitch will make our basket look like it’s knitted with two needles, and it will also make it more rigid, which will be great for our basket’s perfect look.
R7-13: Color change, we used mint-colored raglan. 1 centered stitch in each stitch of the row (56)
On the next row, we’ll make the handles.
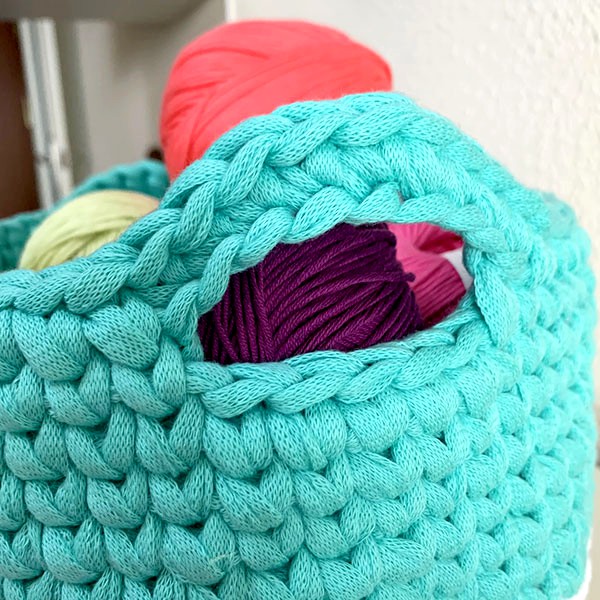
R8: 11 centered single crochets, 9 chain stitches, skip 5 stitches, 24 centered single crochets, 9 chain stitches, skip 5 stitches, 11 centered single crochets (62)
R9: 1 centered single crochet in each stitch (we’ll make regular single crochets in the chains).
As you can see, this stitch gives our teddy bear basket a lovely look.
Snout
We used white teddy bear yarn.
R1: Make a magic ring of 6 single crochet stitches (6)
R2: Increase 1 stitch in each stitch of the row (12)
R3: (1 single crochet, increase 1 stitch) to the end of the row (18)
Fasten off and lose the thread.
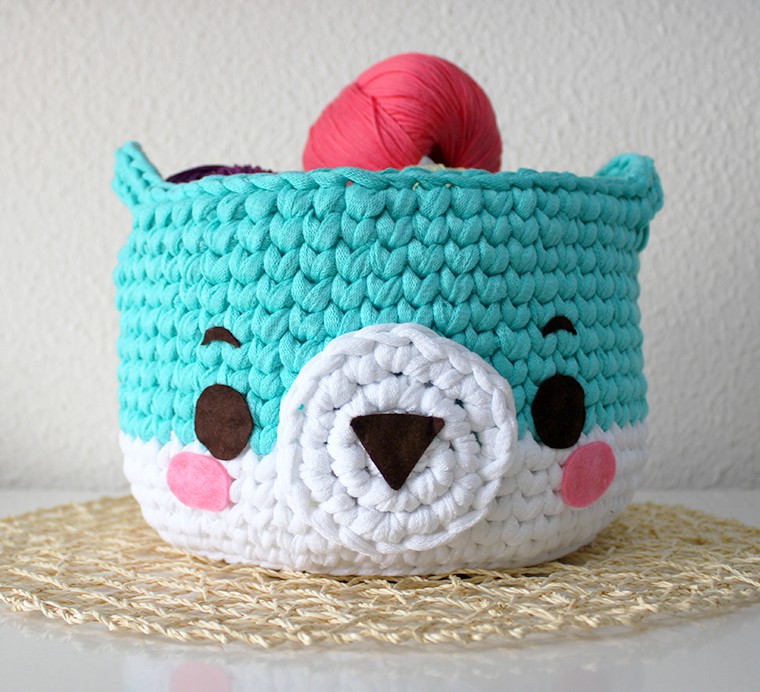
Decorating our teddy bear basket
We sew or glue the snout with silicone or fabric glue at the height you see in the photos or wherever you like best. To hide the finished finish from closing the basket, I glued the snout to the opposite side. You can see the unevenness of the color change from behind, but since it will always be facing forward, it won’t.
We take brown felt and make a triangle for the nose, two circles for the eyes, and then make the eyebrows. We make the blush with pink felt.
And that’s it!
Dear crochet lovers,
Do you enjoy browsing social media for beautiful crochet patterns and creative inspiration? 🧶✨
Check out our Facebook page, where we share stunning designs, fresh ideas, and endless crochet inspiration! Whether you’re a beginner or an expert, you’ll find something to spark your creativity. 💖
🌿 Visit us here: Crochet Made Easy
See also: Crystal Wave Crochet Baby Blanket Pattern
See also: Zig Zag Puff Stitch Crochet
See also: Willow Granny Square Pattern Free