Welcome to Crochet Easy!
Hello, lovely reader! We’re so glad you’ve stopped by. Today, we’re excited to share a truly stunning crochet pattern that we think you’ll fall in love with—it’s the Squared Diamond Granny Throw!
This throw is a beautiful blend of classic crochet and modern style. Its unique design features a series of granny squares that come together to form a striking diamond motif. The interplay of shapes and symmetry creates a sophisticated look that’s both eye-catching and versatile. Whether you’re crafting a cozy blanket for chilly evenings or a decorative piece to brighten up your space, this pattern is a favorite among crocheters for good reason.
What Makes This Pattern Special?
One of the standout features of the Squared Diamond Granny Throw is how it plays with color and texture. Each square is carefully designed so the diamond shape truly pops. You can make it your own by choosing any color combination you like—from subtle and soothing shades to bold and vibrant hues. The flexibility of this pattern makes it perfect for personalized gifts or matching home decor.
Despite its elegant appearance, this pattern is surprisingly approachable. It uses the classic granny square technique, repeated and expanded in a clever way. Whether you’re a beginner looking to challenge yourself or a seasoned crocheter aiming to unwind with a rhythmic project, this throw is a satisfying one to take on.


Materials You’ll Need
Yarn: If you’re using five colors, plan on five 7-ounce skeins—one for each color. The outermost color will use nearly the full skein, while the innermost color will require about half. The other three will fall somewhere in between.
Hook: I used an “I” (5.50mm) crochet hook, but you can adjust the size depending on the project. For example:
-
Use a “G” hook to make smaller squares for a crib blanket.
-
Try a “K” hook with bulky yarn for a large floor throw.
-
A “J” hook with rug yarn works great for a durable mat.
-
If you tend to crochet loosely, a “H” hook might give you similar results to mine.
Don’t stress too much about the hook size—this pattern is quite forgiving and flexible.
Granny Style Notes
For this project, I recommend the traditional 3 double crochet clusters (3DC) with no chains between clusters and 3 chains at the corners.
A helpful tip: To keep your squares looking even and symmetrical, be sure to turn your work at the end of each round. This helps maintain consistency in the stitches and prevents the corners from looking uneven. If turning isn’t your style, you can also cut and rejoin your yarn at the start of each round, but turning is quicker and uses less yarn.
A Few Final Details
The one rule to follow in this pattern? Stick with an even number of rounds—4, 6, 8, 10, 12, and so on. This ensures your squares come out symmetrical and fit together properly.
In my version, I worked 10 rounds total using 5 colors, alternating 2 rounds per color. But feel free to make it your own! You can play around with how many colors you use, how often you switch them, and whether you go for single, double, or even triple rounds of each.
Finishing a Square – Double-Sided and Single-Sided Options
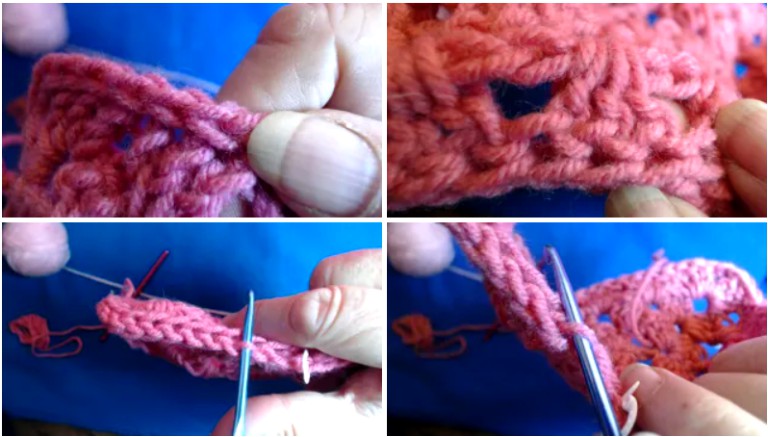
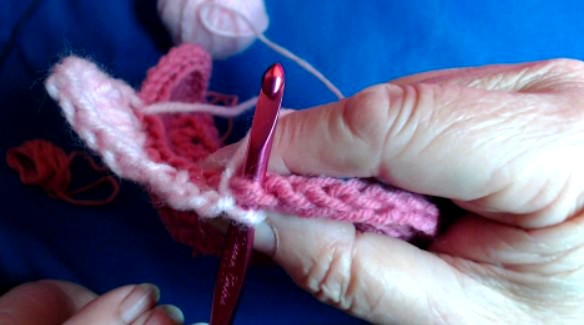
Once you’ve completed the final round of your square, turn your work so the front side is facing you.
To give your square a clean, defined edge, slip stitch (sl st) into the front loop of every stitch around the square, including in the chain-3 spaces (ch-3s) at the corners. Be sure to slip stitch loosely over the chain spaces so the square doesn’t tighten or pucker.
When you reach the center of each side, chain 1 (ch 1) and place a stitch marker in that stitch. This will help you locate the center easily when it’s time to attach your squares together.
Counting Stitches Along Each Side
Wondering how many stitches you should have per side? Here’s a quick breakdown:
-
Each 3 double crochet cluster (3DC) counts as 3 stitches.
-
You’ll also have 2 extra stitches at the corners—not including the stitch placed in the center of the ch-3 space.
Example:
If you have 10 clusters on one side, that’s 3 × 10 = 30 stitches, plus 2 more for the corners.
So, you should have 32 stitches total per side.
Keep in mind:
That extra chain stitch we added in the center of the slip stitch row isn’t counted as an independent stitch. It’s used as a bridge—acting as both the last stitch of one cluster and the first stitch of the next—to maintain symmetry across the square.
Beginning the Sides – Two-Sided Join
Take a close look at the edge where you worked the slip stitch round. You’ll notice two horizontal threads running behind the front and back loops:
-
One is slightly longer and more prominent.
-
The other is shorter, sitting closer to your hook hand.
You’ll use these two threads to join the sides of your square. This technique creates a subtle ridge on both the front and back, giving your throw a beautifully textured, finished look.
When working the corners, locate the two threads at the center of the chain-1 space—the same ones you marked earlier. These will help anchor the corners securely and keep the overall shape nice and crisp.

One-Sided Join Method
If you prefer a flatter finish on the back of your work, the one-sided join is a great option.
Along the edge of your square, use one center thread and the back loop of each stitch to attach rows. When you reach the corners, the two back threads from the center chain-1 (ch-1) space will anchor your corner clusters securely.
Tip: When you’re working single crochets (SCs) at the beginning and end of rows, treat them like ch-1 spaces. Work around the post of the SC just as you would around a regular chain stitch.
Getting Started
-
Locate the center ch-1 stitch that you previously marked.
-
Move backward, toward your hook-holding hand, and insert your hook into the second stitch from the center (this will be the edge of your center cluster on the hook side).
-
Using your center color, work 1 single crochet (SC) into that stitch.
-
Chain 1 (ch 1).
-
In the center marked stitch, work your corner cluster:
(3 double crochet, chain 3, 3 double crochet) — written as (3DC, ch 3, 3DC). -
Chain 1 (ch 1) again.
-
Slip stitch into the second stitch on the opposite side of the center (this will be the outer edge of the opposing center cluster).
-
Chain 3 (ch 3).
-
Count two stitches out from where you just joined with a slip stitch.
-
In that spot, work 1 single crochet (SC).
This sets up the space where your next cluster will go.
-
Turn your work—you’re ready to start the second row!
Row 2
Into the ch-1 space just below the ch-3 you made at the start of this row, work 2 double crochets (2DC). These, along with the ch-3, form your first 3DC cluster.
You’re now on your way to building out the next section of your square!
In the corner tip, start by working a standard corner cluster (3DC, ch 3, 3DC) into the chain space. Then, go back to the original single crochet (SC) where you first joined the color and work another 3 double crochet (3DC) cluster into that same stitch.
To finish off the color, make a single crochet (SC) into the second stitch up from your last cluster, then fasten off your yarn. Don’t forget to turn your work—you’re all set for the next section!
Why Use SC Stitches for Tying On and Off?
Using single crochet (SC) stitches to tie on and off helps conceal the yarn ends within the color change instead of at the edges. This makes it easier to hide the ends and ensures a cleaner, more polished finish.
Row 3 Instructions:
-
Position your work to add the next color.
-
Slip stitch (sl st) into the second stitch from the last used stitch on that side (this is the first stitch of the third cluster on the hook side).
-
Chain 1 (Ch 1), then work a 3-double crochet (3DC) cluster in the SC space at the end of the last color.
-
Continue working in the granny style, through the side and around the corner to the other side.
-
On the opposite side, chain 1 (Ch 1), slip stitch (sl st) to the second chain from the last attachment, chain 3 (Ch 3), and single crochet (SC) in the second stitch out from the last slip stitch (this will be the first stitch of the third cluster on that side).
-
Turn your work.
Repeat these steps for each row and color set, continuing this pattern until you reach the corners.
At the Corners:
-
For Row 8, chain 3 after completing Row 7.
-
Do not attach to the side. Instead, turn your work and use the space from the last row to continue downward.
-
Complete the cluster with the initial chain 3.
-
At the end of the row, do not tie off or attach. Instead, pull out a long stitch, loosely tie it, leave a slightly long tail, and cut.
-
Turn your work so the front side is facing you. Move to the next side, and at the end of the 8th row, chain 1 and slip stitch into the top of the chain 3 from the previous side. Tie off and turn your work to the front again.
-
Continue working on the next side and repeat the process for each side.
-
Finally, use the long tail from the first section to chain 1 and slip stitch to the last side, completing the edge.
Row 9:
-
Position the center cluster over the corners, concealing the ch-1 space as you would when hiding a tail.
-
Connect the cluster to the corner stitch in the lower color, but do not stitch around it like you normally would for granny corner clusters.
-
Instead, work behind the front loop and use the two middle loops. This technique leaves the stitch ridges visible on the inner diamond, creating a layered effect where the inner square appears to rest on the outer one.
-
You can choose any color to finish the outer square, but matching the inner square’s color often creates a more cohesive look.
For each subsequent layer of outer squares, follow the same process as the first. Make your slip stitch (sl st) row using only the front loops, and attach side connections to the inner loops of this row.
As the squares expand, each side configuration will vary. You may add additional color bands or more rows of each color to subsequent layers. You can also add one or two extra rows to complete the throw, depending on your preference.
Embrace Flexibility and Enjoy the Process
Crochet is wonderfully forgiving, so don’t hesitate to adjust a few stitches if needed. Minor tweaks won’t be noticeable and can help ensure everything aligns properly.
Line-by-Line Instructions:
Start:
Create a magic circle.
Row 1:
-
Chain 3 (counts as the first double crochet).
-
Work 2 double crochets in the magic circle.
-
Chain 3, then work 3 double crochets into the circle (repeat this step 3 times).
-
Chain 2, then close the magic circle by pulling the end tight.
-
Single crochet (SC) into the top of the initial chain 3.
-
Chain 3 and turn your work (remember to turn your work at the beginning of each row).
Row 2:
-
Work 2 double crochets in the chain-2 space from the previous row.
-
In the next chain-3 space, make 3 double crochets, then chain 3, and make another 3 double crochets.
-
Repeat this step 2 times.
-
Make 3 double crochets around the post of the single crochet from the previous row.
-
Chain 3, then slip stitch into the top of the first chain-3 from this row.
-
Cut the yarn and fasten off. Turn your work.
Row 3:
-
Change to a new color.
-
Slip stitch into any side space.
-
Chain 3 (counts as the first double crochet) and make 2 more double crochets in the same space.
-
In the next corner space, make 3 double crochets, chain 3, and 3 double crochets.
-
In the next gap, make 3 double crochets.
-
In the next corner space, make 3 double crochets, chain 3, and 3 double crochets.
-
Repeat steps 4-6 all the way around until you get back to the first corner.
-
Slip stitch into the top of the first chain-3 you made.
-
Chain 3 and turn your work.
Row 4:
-
Work 2 double crochets (DC) in the same space, then 3 DC in each subsequent space.
-
In each corner cluster’s chain-3 space, work 3 DC, chain 3, 3 DC.
-
Slip stitch to the top of the first chain-3 to join.
-
Fasten off.
Row 5:
-
Change color.
-
Slip stitch into any middle gap.
-
Chain 3, then work 2 double crochet (2DC) stitches into the same gap.
-
Work 3 DC into each gap around.
-
In each corner space (where there is a chain 3 from the previous row), work a corner cluster: [3DC, Ch 3, 3DC].
-
Slip stitch to the top of the first Ch 3 in the first cluster.
-
Chain 3 and turn.
Row 6:
-
Work 2 double crochets (DC) into the same gap.
-
In each subsequent gap, work 3 double crochets.
-
In each chain-3 corner, make a corner cluster.
-
Slip stitch to the top of the first chain-3, then fasten off and turn your work.
Row 7:
-
Change color.
-
Slip stitch into any middle gap, then chain 3 and work 2 double crochets (DC) into the same gap.
-
Work 3 double crochets in each remaining gap, and create a corner cluster in each corner.
-
Slip stitch to the top of the initial chain-3, chain 3, and turn your work.
Rows 8 to 10:
-
Repeat Rows 6 and 7. Do not turn at the end of Row 10.
Outside of Square:
-
With the slip stitch (Slp St) on your hook and the front of the last row facing you, work a slip stitch in the front loop of each double crochet (DC) and loosely in each chain.
-
Chain 1 (Ch1) in the center of each side, and mark this Ch1.
-
Slip stitch to the first slip stitch and tie off.
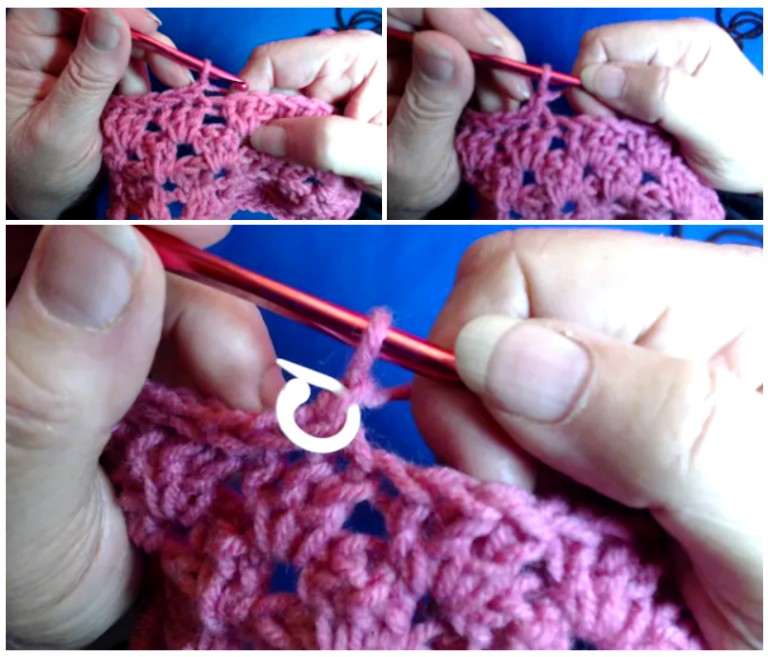
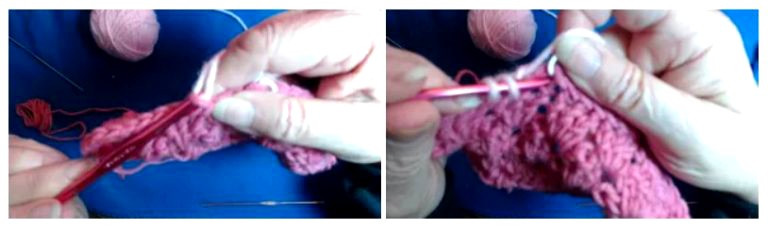
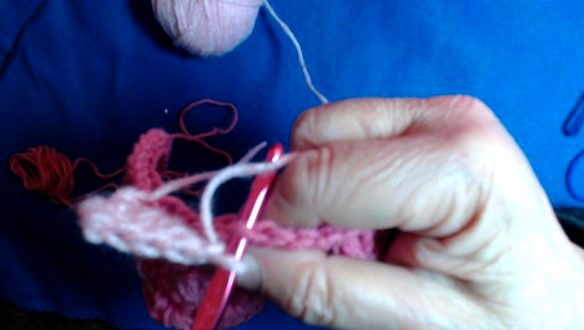
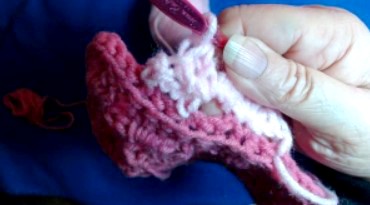
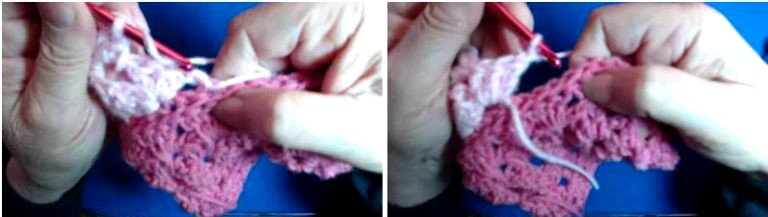
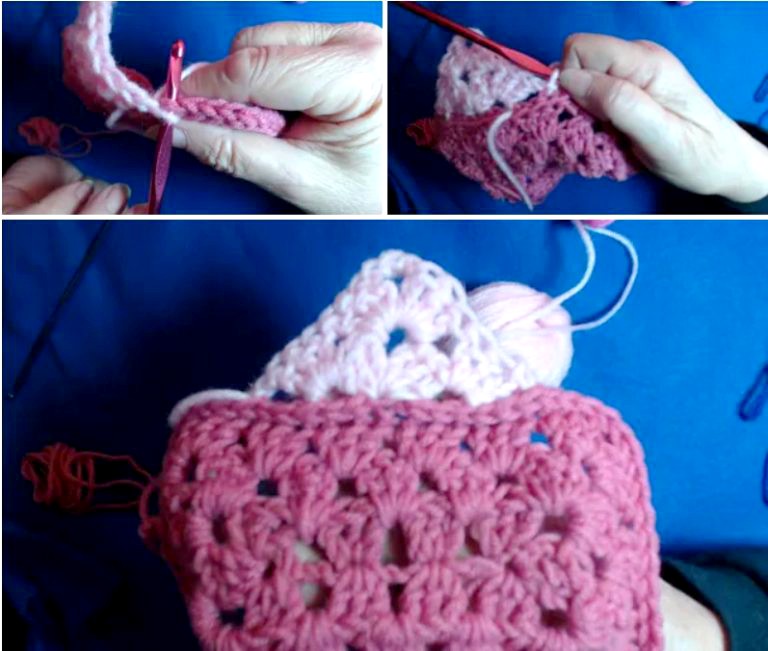
Refer to the pictures in the long notes above for visual guidance.
Notes:
Row Connections:
-
Two-Sided Connections: Connect along the center of two threads on the edge (refer to the detailed note above).
-
One-Sided Connections: Attach to the center thread behind the slip stitches and the back loop.
Outer Sections:
-
Even Rows: Begin and end with a single crochet (SC).
-
Odd Rows: Begin and end with a chain 1 (Ch1).
-
Row 8: This row does not connect to the inner square.
First Side:
Row 1:
Looking at your work from the center out, slip stitch (Slp st) into the 3rd double crochet (DC) of the first center cluster. Chain 1. In the marked chain-1 space, work the following:
-
3 double crochets (DC), chain 3, and 3 double crochets (DC) to form your corner set.
-
Chain 1, then slip stitch into the 3rd DC of the cluster on the other side of the center.
Row 1 (Starting from the center):
-
Slip stitch into the 3rd double crochet (DC) of the first cluster in the center.
-
Chain 1, and in the marked chain-1 space, work:
-
3 double crochets (DC), chain 3, and 3 double crochets (DC) to create one corner.
-
-
Chain 1, then slip stitch into the 3rd DC of the cluster on the opposite side.
Let me know if you need further clarification on any part of the instructions!
Row 2:
-
Chain 3, then single crochet (SC) into the middle DC of the next cluster. Turn your work.
-
In the chain-1 space, work 2 double crochets (DC).
-
In the corner chain-3 space, work the corner set (3DC, Ch3, 3DC).
-
Work 3 double crochets (DC) into the next chain-1 space.
-
Single crochet (SC) into the middle DC of the next cluster.
-
Tie off, then turn your work.
Row 3:
-
Change color. Slip stitch to the first double crochet (DC) of the next cluster.
-
Chain 1, then work 3 double crochets (DC) into the single crochet (SC) space.
-
Work 3 DC into the next gap.
-
Set the corner with the appropriate stitch pattern, then work 3 DC into the following gap, and another 3 DC into the SC.
-
Chain 1, and slip stitch to the first DC of the next cluster.
Row 4:
-
Chain 3, then single crochet (SC) into the last double crochet (DC) of the same cluster.
-
Turn your work.
-
Work 2 double crochets (DC) into the chain-1 space.
-
Work 3 double crochets (DC) into each of the following 2 gaps.
-
Create the corner with your pattern, then work 3 DC into the next 2 gaps.
-
Work 3 DC into the chain-1 space.
-
Single crochet (SC) into the last DC of the same cluster.
-
Fasten off and turn your work.
Row 5:
-
Change color. Slip stitch to the middle double crochet (DC) of the next cluster.
-
Chain 1, then work 3 DC into the single crochet (SC).
-
Work 3 DC into each of the gaps around.
-
In each corner, create the corner set (3DC, Ch3, 3DC).
-
Chain 1, then slip stitch to the middle DC of the next cluster.
Row 6:
-
Chain 3, then single crochet (SC) into the first double crochet (DC) of the next cluster.
-
Turn your work.
-
Work 2 DC into the chain-1 space.
-
Work 3 DC into each of the next 2 gaps.
-
Create the corner with your pattern, then work 3 DC into the next 2 gaps.
-
Work 3 DC into the chain-1 space.
-
Single crochet (SC) into the first DC of the next cluster.
-
Fasten off and turn the work.
Row 7:
-
Change color. Attach the new color to the last double crochet (DC) on the side.
-
Chain 1, then work 3 DC into each single crochet (SC) and gap around.
-
In the corners, work the corner set (3DC, Ch3, 3DC).
-
Continue with 3 DC in each gap and 3 DC in each SC.
-
Chain 1, slip stitch to the last DC of the side.
-
Chain 3, and turn your work.
Row 8:
-
Work 2 double crochet (DC) stitches into the chain-1 space.
-
Then make 3 DC stitches in each gap along the row.
-
In the corner spaces, work the corner set (3DC, Ch3, 3DC).
-
Continue by making 3 DC stitches in each gap, finishing with 3 DC in the chain-1 space.
-
Pull out a long loop or secure with a marker, leaving a 4-5 inch tail.
-
Cut the yarn and turn your work.
End of First Side Section
Second to Fourth Sections:
-
Front Facing: Hold your work with the front facing you.
-
Move to the Side: Shift to the side behind your hook hand (right side if you’re right-handed, left side if you’re left-handed).
-
Repeat and Finish Row 8: Work as you did before. At the end of row 8, chain 1 and slip stitch into the 3rd chain of the last section you made.
-
Adjust and Slip Stitch: Undo the long loop from the first section of row 8. Chain 1 and slip stitch into the top of the chain-3 from the 4th section of row 8.
-
Turn Your Work: Turn your work so the back of row 8 is facing you.
Row 9:
-
Attach your yarn to any gap near a corner of the inner square.
-
Chain 3, and work 2 more double crochet stitches into the same gap.
-
In the next gap, work 3 double crochet stitches over the chain-1 space from Row 8, and through the back loops of the chain-3 corner from the inner square.
-
Continue with 3 double crochet stitches in each gap around.
-
At each corner, work a cluster of double crochet stitches into the chain-3 space.
-
Repeat until you reach the beginning of the row.
-
Slip stitch into the 3rd chain of your first double crochet to join the row.
Row 10:
-
Chain 3 and turn.
-
Work 2 double crochets (DC) into the same space, then 3 DC in each space and corner set in each corner until the end.
-
Slip stitch into the top of the initial chain 3. Do not turn.
Slip Stitch Row:
-
Slip stitch into the front loops of each double crochet (DC) and chain stitch.
-
Add an extra chain stitch in the center of each side and mark it.
-
Slip stitch into the first slip stitch you made.
-
Fasten off your yarn.
End of Second Square.
The Third Square:
Rows 1-12: Repeat the same steps as rows 1-6 from the previous outer corner sets.
You will finish tying off at Row 12. This will mark the end of the first color in your second round of color changes. Row 12 will start and end on the middle double crochet (DC) of the ‘second to last cluster’ on each side.
End of Separate Sides:
Row 13:
-
Start by working a few clusters back.
-
Introduce the second color with a slip stitch, then chain 3.
-
Work up to the inner corner, chain 1, and slip stitch into the last cluster at the inner corner.
Extra Step:
-
Turn your work to see the back of the slip stitch.
-
Slip stitch into the “leg” of the slip stitch.
-
Chain 2, chain 1, and slip stitch into the first double crochet of the last cluster at the inner corner.
-
Repeat the Extra Step: Chain 1, and work 3 double crochets (DC) into the single crochet gap.
Repeat:
-
Repeat the process at each inner corner.
-
Cluster in each cluster around and set clusters in each corner.
-
Chain 1, then slip stitch into the top of the chain-3.
-
Chain 3, then turn your work.
Row 14:
-
Work 3 double crochet (DC) stitches in each gap along the row.
-
In each corner, make the corner set.
-
In the chain-1 space before the inner corner, work 3 DC.
-
Skip the chain-2 space.
-
Chain 1, then work 3 DC into the next chain-1 space.
-
Continue this pattern around to the beginning.
-
Chain 1 and slip stitch into the 3rd chain of the initial chain-3.
-
Cut the yarn and secure the end.
Rows 15 to 20 – Color Changes:
-
Add the third color at any point.
-
Complete the last 6 rows following the same pattern as rows 7-10 of the inner granny square.
Outside Edge:
To finish off your project, we’ll use the Barred Single Crochet (SC), a unique stitch that adds a beautifully finished, two-sided edge to match the effort put into this double-sided design.
-
After finishing Row 20 with a slip stitch, chain 1 and turn your work.
-
This allows you to use the backside of your project for the edge, ensuring a consistent finish all around.
-
Barred SC (Single Crochet):
-
Use the side of your hook to pull the working yarn forward.
-
Insert your hook into the top of the next double crochet (DC) stitch.
-
To exaggerate your hook’s entry, bend the handle of your hook down and in front. This positions the working yarn where you can catch it with your thumb on the edge of the stitch.
-
Pull the working yarn through the stitch, then release the yarn from your thumb.
-
Yarn over (YO) and complete the single crochet (SC) stitch as usual.
Summary of Barred SC:
-
Drag the yarn forward, insert the hook, bend the handle, catch the yarn, pull the loop through, release the yarn, yarn over, and pull through the two loops.
Finish:
-
Finish with a slip stitch to the starting chain and tie off your yarn.
Congratulations! You did it!
With these final touches and the Barred Single Crochet edge, your project will have a lovely and unique finish. Let me know if you’d like any further adjustments or clarifications!
VIDEO TUTORIAL
Dear reader, we have put together a lovely and educational video tutorial for you. It is a perfect video from the YouTube channel Crafty Chrystal and you can watch it below:
Right Hand:
Left Hand:
The Durability and Comfort of the Squared Diamond Granny Throw
The Squared Diamond Granny Throw isn’t just a project—it’s a statement piece. Its durability and comfort make it a valuable addition to any home. Whether you choose to gift it or use it as a personal décor item, this pattern brings elegance, style, and a sense of accomplishment. By embracing the Squared Diamond Granny Throw, you’re not just creating a unique piece; you’re also celebrating the timeless beauty and tradition of crochet.
What Do You Think, Dear Reader?
Isn’t this crochet pattern just lovely? And, believe it or not, it’s easier to make than you might think! It’s the perfect project to share with your best friends—so why not spread the joy and get others hooked on this beautiful pattern too?
Thank You for Joining Us!
We’re so grateful to have you in our cozy little crochet corner. Here, you’ll find a variety of free crochet patterns to explore across different categories. We hope you’ll return again and again to see what’s new, and perhaps even find your next favorite project.
Now, let’s get started! Grab your yarn and crochet hook, and let’s dive in! Wishing you a day full of creativity and joy.
XoXo,