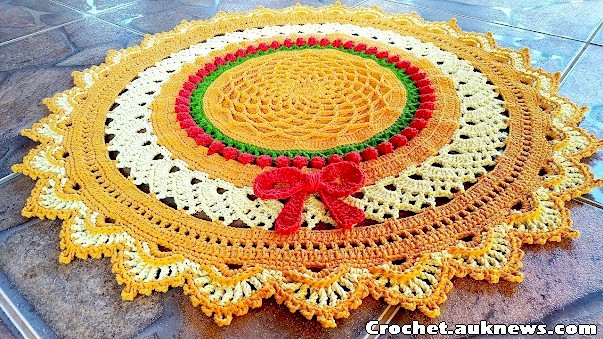
How to Crochet a Russian Rug with Bows – Step-by-Step Guide
Creating a Russian-style crochet rug with bows is a fun and rewarding project that adds a unique touch to your home decor. Follow this simple step-by-step guide to make your own beautifully textured rug.
Materials You’ll Need:
- A crochet hook (size suitable for your yarn)
- Bulky-weight yarn in multiple colours (or a single shade, depending on your preference)
- Scissors
- A yarn needle
Instructions:
1. Choose Your Colours
Russian-style crochet rugs are often made using a mix of vibrant colours, creating a striking and eye-catching design. You can use as many shades as you like to achieve the look you want.
2. Create the Foundation Chain
Start with a slipknot and chain the number of stitches needed for the rug’s width. The length of the chain will determine the overall size. For example, a small rug might require around 40 chains.
3. Begin the Base Rows
- Row 1: Work a single crochet into the second chain from the hook, then continue single crocheting across the row. Chain 1 and turn.
- Row 2: Single crochet in each stitch across. Chain 1 and turn.
- Repeat Row 2 until your rug reaches the desired length. This forms the sturdy base of your rug.
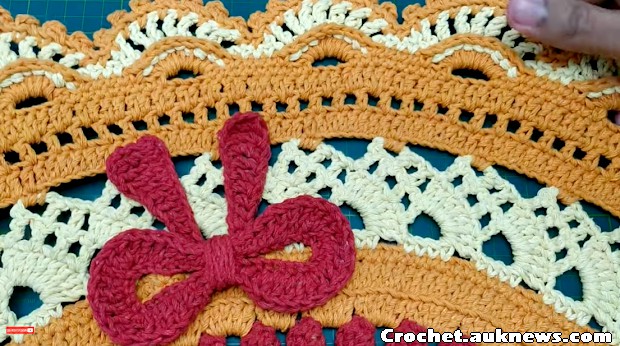
4. Start Creating the Bow Pattern
Now it’s time to add the decorative bows. You can switch to a different colour or continue with the same yarn, depending on your design choice.
- Bow Row 1: Work a single crochet in each stitch across. Chain 1 and turn.
- Bow Row 2: Single crochet, chain 4, skip 2 stitches, single crochet in the next stitch. Repeat this pattern across the row. This creates the bow loops. Chain 1 and turn.
- Bow Row 3: Single crochet in the next single crochet, then work 4 single crochets into the chain-4 space. Repeat this across the row. This forms the bow shapes.
Repeat Bow Rows 2 and 3 as many times as needed to create the number of bows you want. You can keep them in a single colour or alternate between different shades to create a patterned effect.
5. Secure the Bows and Add a Border
Once you’re happy with the bow section, switch back to the base colour.
- Base Row: Single crochet across the row. Chain 1 and turn.
- Repeat this step for a few rows to form a border that secures the bows in place and gives the rug a neat finish.
6. Finishing Touches
- When you reach the desired size, fasten off the yarn, leaving a long tail.
- Use a yarn needle to weave in any loose ends, ensuring a clean and professional look.
Tutorial Video
🌿 Visit us here: Crochet Made Easy
See also: Crystal Wave Crochet Baby Blanket Pattern
See also: Zig Zag Puff Stitch Crochet
See also: Willow Granny Square Pattern Free
Your Handmade Russian Crochet Rug is Complete!
Now you have a beautiful, handcrafted rug with a textured bow pattern. Experiment with different colour combinations and sizes to make it uniquely yours. Enjoy your crochet project!
Would you like a tutorial video to go along with this guide? Let me know! Happy crocheting!