Spiral Granny Square Crochet Tutorial: Add a Fun Twist to a Classic Design
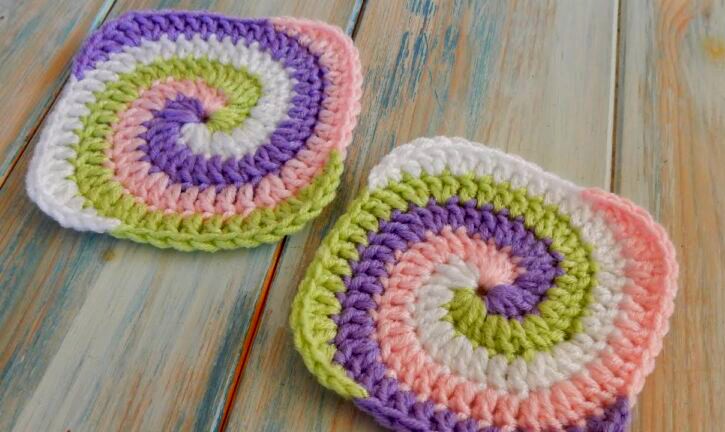
Granny squares are a timeless favorite in the crochet world—but if you’re looking for something with a little more flair, the spiral granny square is just the thing! With its continuous swirl of color, this modern take on a classic design adds movement and vibrancy to any project. Whether you’re making blankets, pillows, or wearable pieces, this pattern is sure to stand out.
In this step-by-step guide, I’ll walk you through how to crochet your own spiral granny square. So grab your hook, pick out some colorful yarn, and let’s get started!
✨ Why You’ll Love the Spiral Granny Square
This pattern puts a creative twist on the traditional granny square. Instead of working each round in a single color, you’ll be using two or more colors that spiral around each other seamlessly. It looks intricate but is surprisingly beginner-friendly. The result? A dynamic, eye-catching square that’s perfect for mixing and matching in larger projects.
🧶 What You’ll Need
-
Yarn: Choose two or more contrasting colors for the best effect. Worsted weight yarn works well for this pattern.
-
Hook: Use the hook size recommended for your yarn. A 4mm hook is a great starting point for most worsted-weight yarns.
-
Tapestry needle: For weaving in ends.
-
Scissors
Spiral Granny Square
🧵 Let’s Crochet!
To create the spiral effect, you’ll alternate colors as you go. Each round is split: one half worked in your main color (MC), and the other in your contrast color (CC). You’ll switch colors mid-round to keep the spiral flowing smoothly.
You’ll be making 80 spiral squares in total for a full project like a blanket, but feel free to start with just one to practice.
🌀 Spiral Granny Square Pattern
With Main Color (MC), chain 2.
Round 1:
-
In the 2nd chain from the hook, work 2 dc, ch 2. Remove your hook and join your Contrast Color (CC).
-
With CC, in the same stitch, work 2 dc, ch 2. Remove the hook.
-
Reinsert your hook into the top of the first 2 dc (MC) and join with a slip stitch.
Round 2:
-
With MC, work 2 tr in next stitch, 3 tr in the next. Remove hook and join CC.
-
With CC, 3 tr in each of the next 2 stitches. Remove hook and rejoin MC.
-
With MC, 3 tr in the next 2 stitches. Remove hook and rejoin CC.
-
With CC, 2 tr in next stitch, 2 tr in the next. Join with a slip stitch.
Round 3:
-
With MC, 2 tr in next stitch, then 3 tr in each of the next 3 stitches. Remove hook and switch to CC.
-
With CC, 2 tr in next stitch, then 3 tr in each of the next 3 stitches. Remove hook and rejoin MC.
-
With MC, 2 tr in next stitch, 3 tr in the next, 2 tr in the next. Join with a slip stitch.
Round 4:
-
With MC, work (2 tr, 2 tr in next st) 6 times. Remove hook.
-
With CC, repeat (2 tr, 2 tr in next st) 6 times. Remove hook. (48 sts total)
Round 5:
-
With MC: 3 tr, then (2 tr in next st) 4 times, 3 tr, 2 tr in next st, 3 dc, 2 dc in next st. Remove hook.
-
With CC: repeat same sequence: (3 tr, 2 tr in next st) 4 times, 3 tr, 2 tr in next st, 3 dc, 2 dc in next st. Join with slip stitch.
-
Fasten off MC.
Round 6 (with CC):
-
Work 19 stitches. Note: chain 10 does not count as a stitch.
-
In the next stitch: 3 dc.
-
In the following: 1 dc, 1 htr, 2 tr.
-
In the next: 2 dtr.
-
In the next: (3 dtr, ch 2, 3 dtr)—this forms the corner.
-
Then: 2 dtr in next stitch.
-
Next: 2 tr, 1 htr, 1 dc.
-
Then: 3 dc.
-
Join with slip stitch.
🧩 Finishing Touches
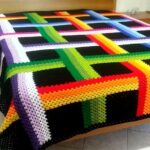
Lay out your spiral squares in your desired arrangement. Join them using slip stitches along the edges for a neat, seamless look. You can also use your preferred joining method like whip stitch or mattress stitch.
💡 Final Thoughts
The spiral granny square is a brilliant way to play with color and texture in your crochet work. It’s a project that grows quickly and looks complex—yet it’s simple enough for confident beginners to tackle. Customize it with your favorite color combinations and watch your project come to life with a unique, swirling design.
So go ahead—give this twist on a classic a try and let your creativity spiral!