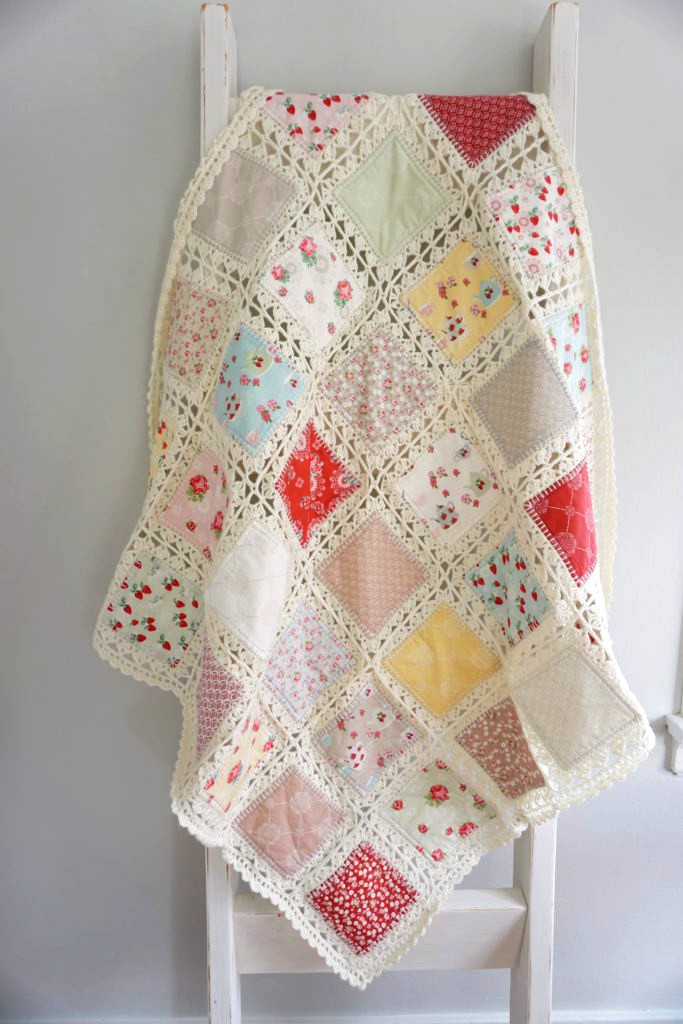
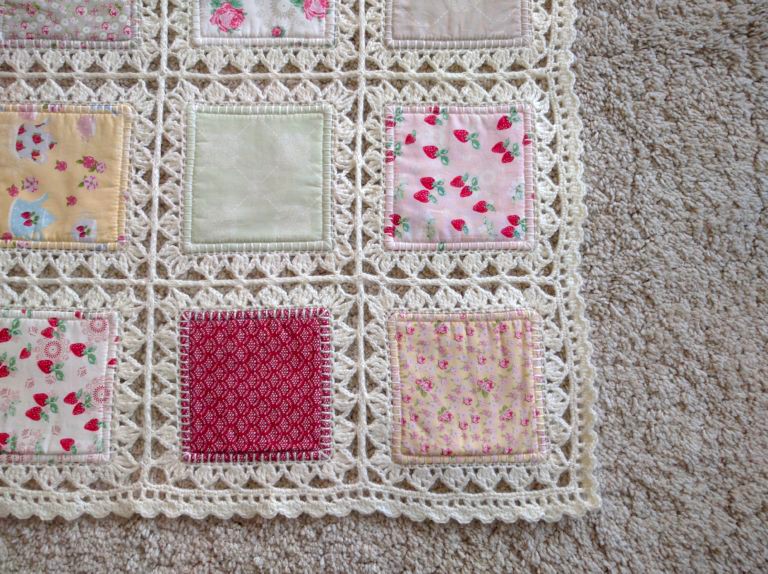
I’m so excited to finally present the tutorial for my High Tea Crochet Quilt! However, it’s still a work in progress. Right now it guides you through the sewing and crocheting of the squares for the blanket. I will be updating this page with the instructions for joining the squares and adding the border.
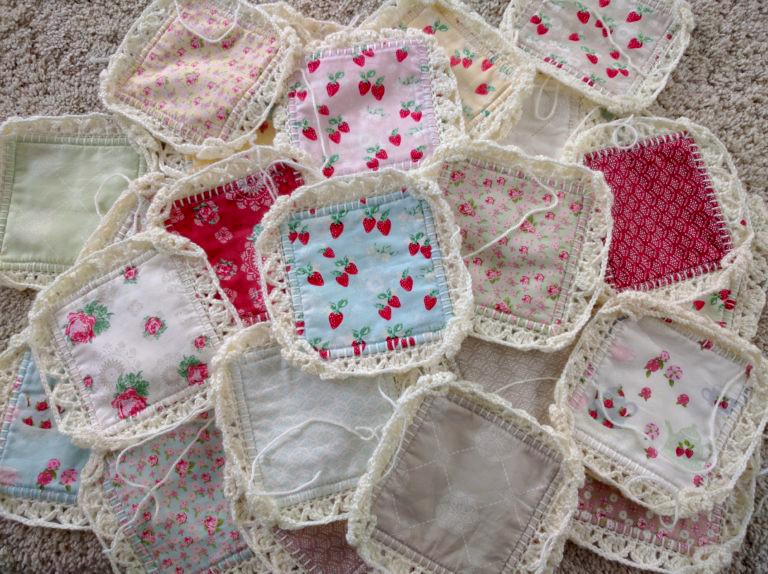
The High Tea Crochet Quilt is baby blanket size, approx 44″ x 44″. I used each of the 36 prints in Jera’s High Tea Collection. I had a full fat quarter bundle at my disposal, but you could make this blanket with as few as 9 fat quarters by cutting 9 6-inch squares from each.
To make the blanket you only need basic sewing skills and some experience with crochet. I have included pictures, videos and illustrations to help those who are more visual learners. If you find any errors, please let me know in the comments.
Supplies Needed:
72 6-inch squares of fabric (36 for the front and 36 for the back)
36 6-inch squares of batting
300 grams of fingering weight yarn (I used 6 skeins of Bernat Baby in antique white)
Other supplies: sewing machine, thread, large eyed needle, crochet hook
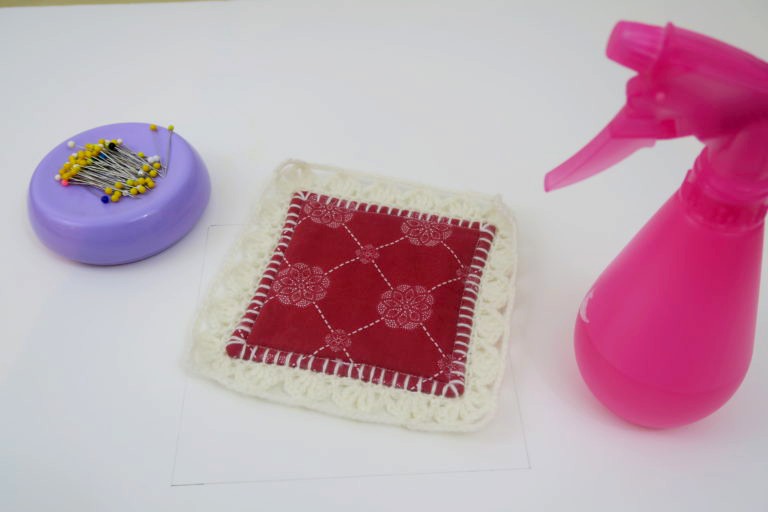
Supplies for blocking squares: large piece of cardboard or foam board, spray bottle, pins
Part 1: Fabric Squares
@
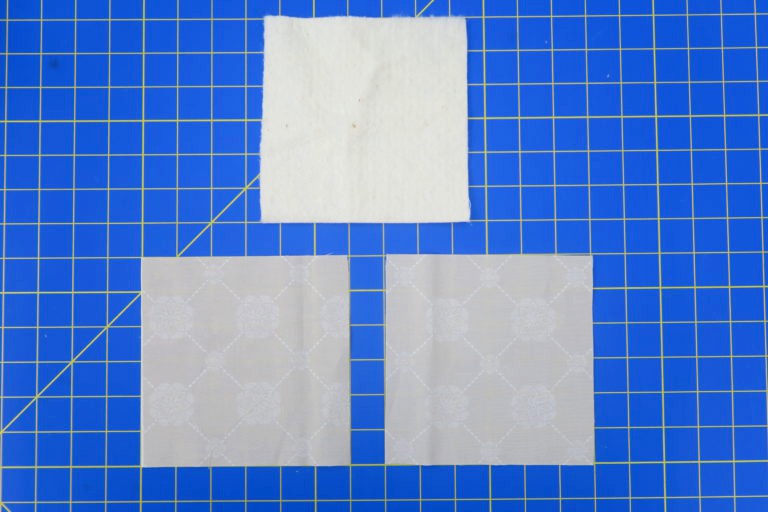
Place two 6-inch fabric squares right sides together, then place a batting square on top.
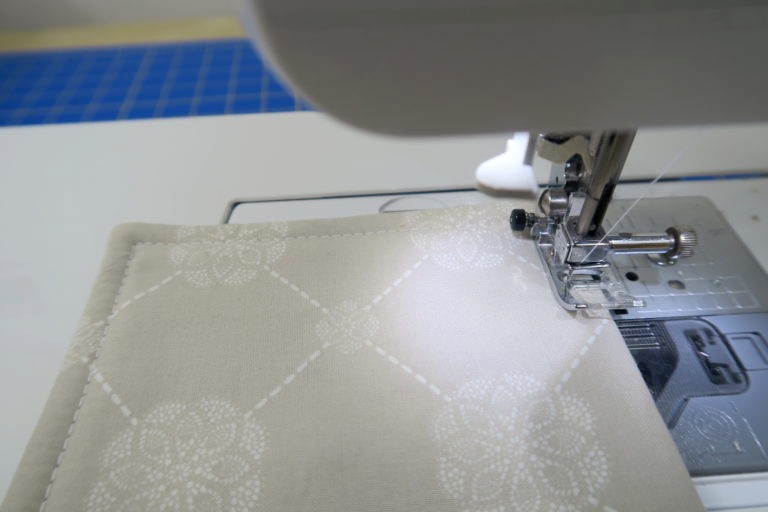
Sew around the square 1/2-inch from the edge of the fabric, leaving a 2-inch gap for turning. Back stitch at the beginning and end.
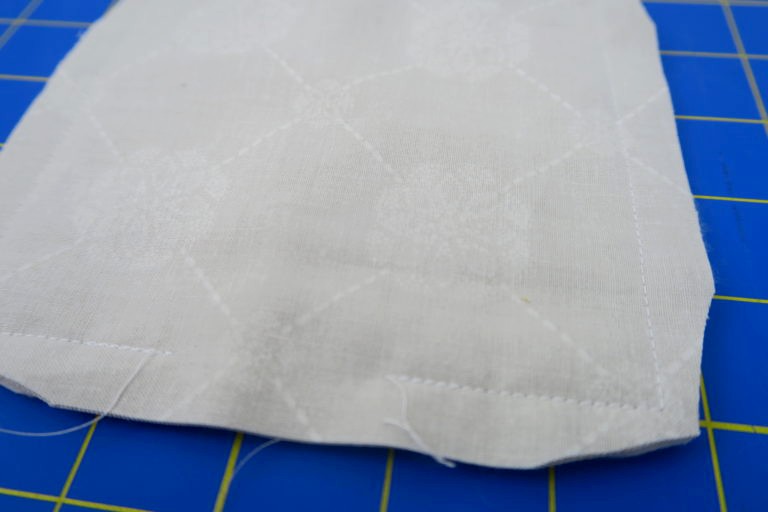
Clip corners and turn right side out. Press.
Top stitch around the square approx 1/4-inch from the edge of the fabric.
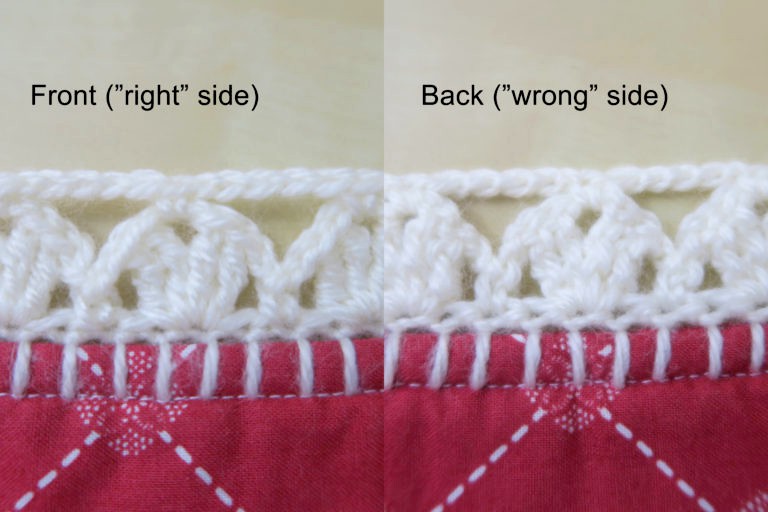
Part 2: Blanket Stitch
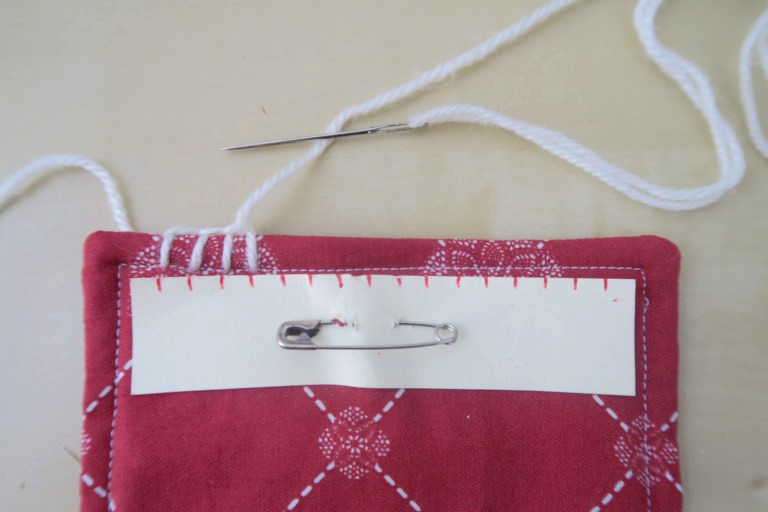
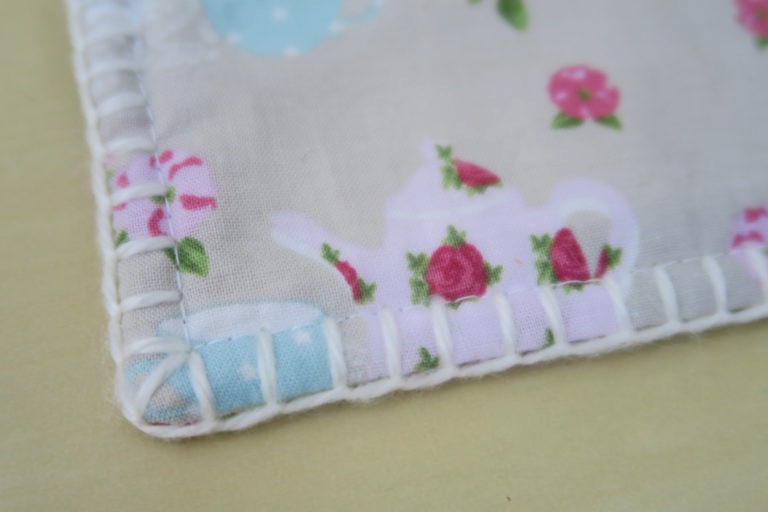
Blanket stitch around the edge of the square: 16 stitches on each side, and 3 stitches in each corner [76 stitches total].
I made a guide for myself with a piece of card stock. I cut it 4.25-inches long and put a mark every quarter inch. I pinned the card to the fabric square as I sewed.

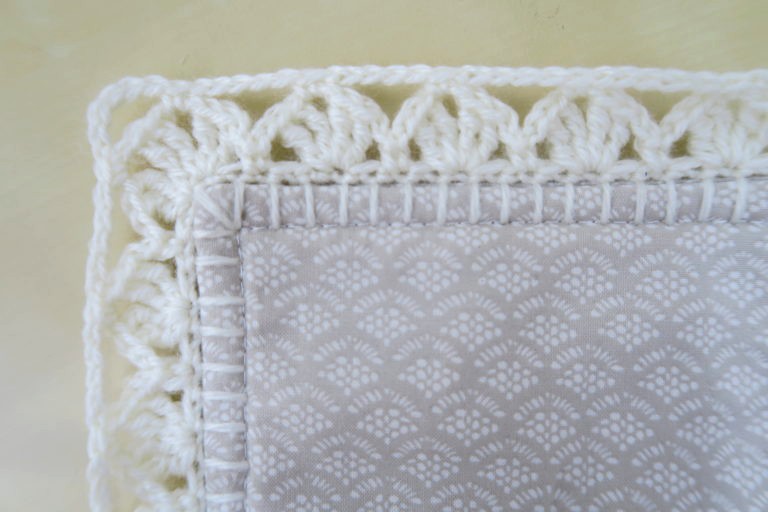
Part 3: Crocheting around the Squares
I used a size D-3 crochet hook, but gauge is not that important for this project. You just want the completed squares to lay flat after you have blocked them. For reference my crocheted border is about 7/8th-inch wide.
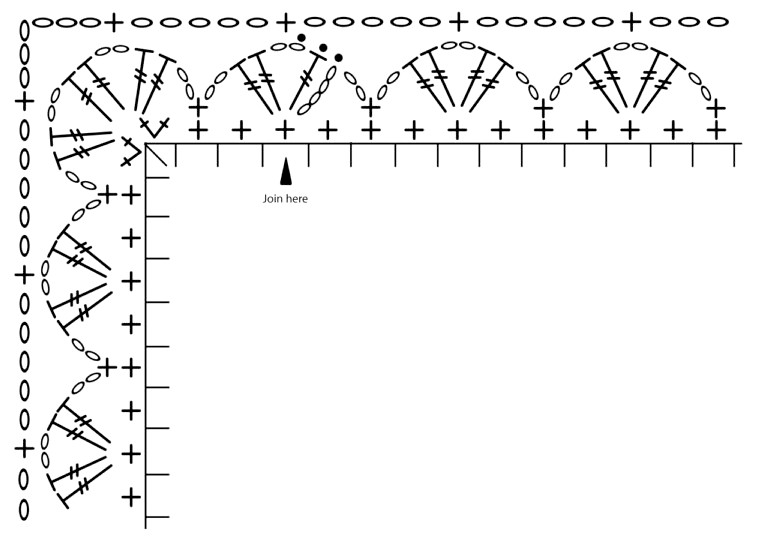
Row 1–Join with a sl st in the 4th blanket stitch from the corner, sc in each blanket stitch on the sides and 2 sc in each corner stitch around [80 stitches total], join with a sl st in beginning sc.
Row 2–Beginning shell [(ch 4, trc, ch 2, 2 trc, ch 2) in joining st, sk 1 sc, sc in next sc.] Corner Shell [ch 2, sk 1 sc, in next sc (2 trc, ch 2, trc), in next st (trc, ch 2, 2 trc), ch 2, sk 1 sc, sc in next sc.] Shell [ch 2, sk 1 sc, in next sc (2 trc, ch 2, 2 trc), ch 2, sk 1 sc, sc in next sc.] Work 4 Shells on each side around. Work Corner Shell in each corner. End with ch 2, sl st into top of beginning ch 4.
Row 3–Sl st to next ch 2 space, sc, ch 5. Corner [sc in first ch 2 space at top of corner shell, ch 6, sc in next ch 2 space]. Side [ch 5, sc in ch 2 space at top of next shell]. Continue around. Join with sl st in beginning sc. Tie off. Weave in all ends.
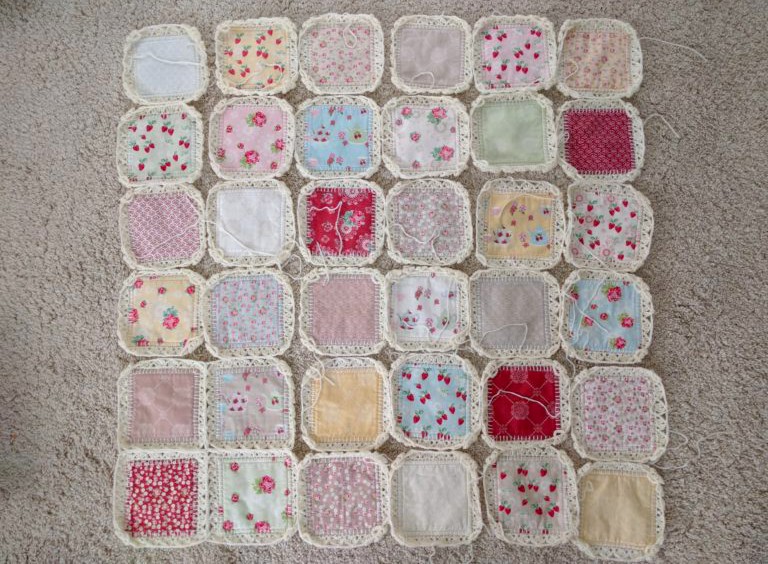
Part 4: Blocking & Joining the Squares
Blocking the squares is a process that may help them to lay a bit flatter. Use a spray bottle to wet the yarn around the block. It just needs to be damp, not soaking. Pin the crochet to a piece of cardboard or foam board (or your carpet or mattress–whatever you’ve got) so that it is square. Let it dry completely. (To be honest, I skipped this step with my blanket because I was in a rush to get it done. You could also block the whole blanket after it’s done.)
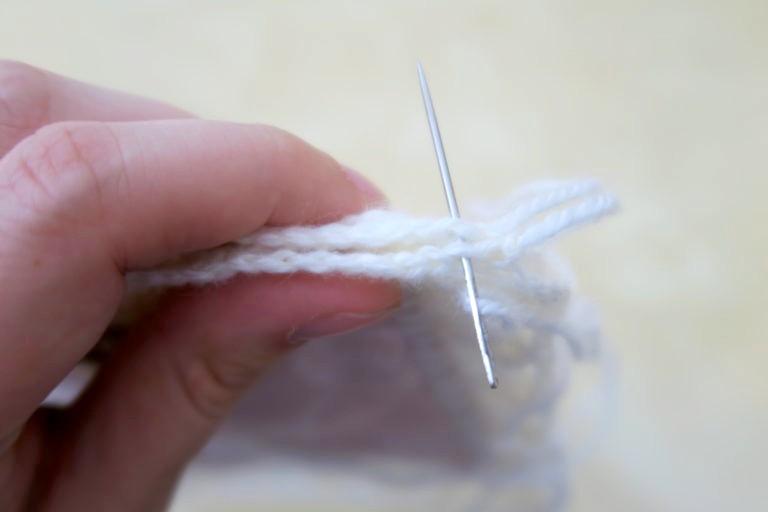
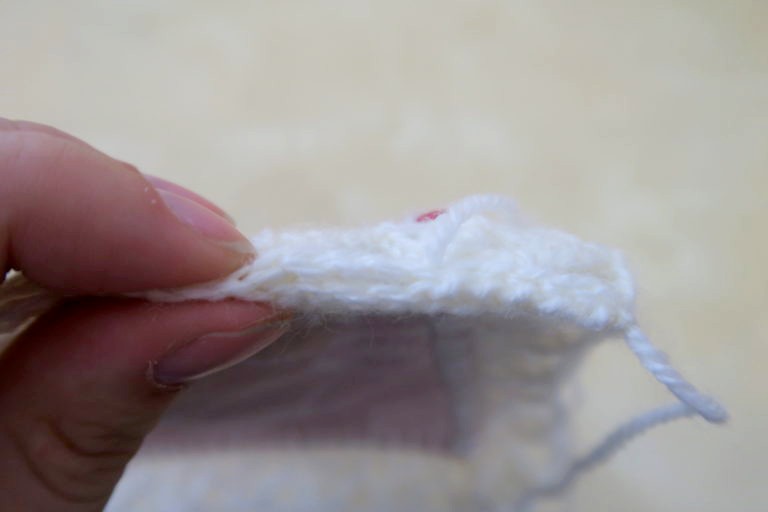
Sew the squares together with a whip stitch. I sewed them into pairs and then sewed the pairs into groups of 4 in order to avoid having to sew really long seams.


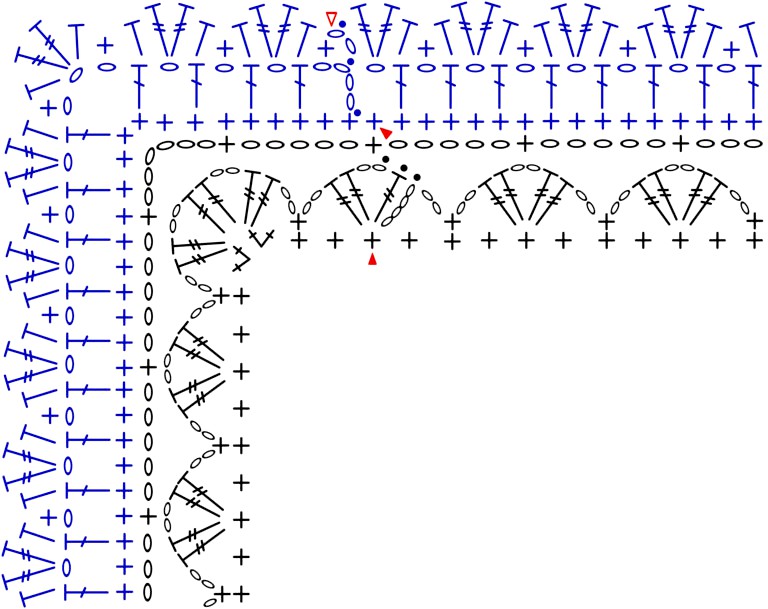
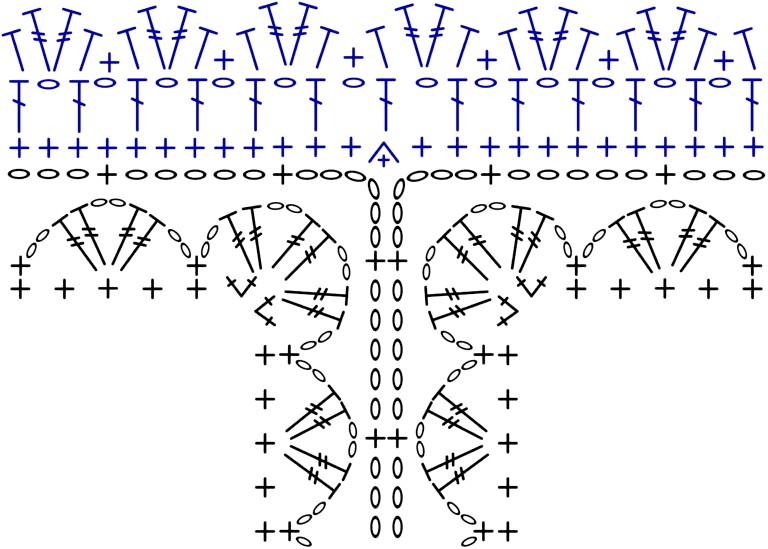
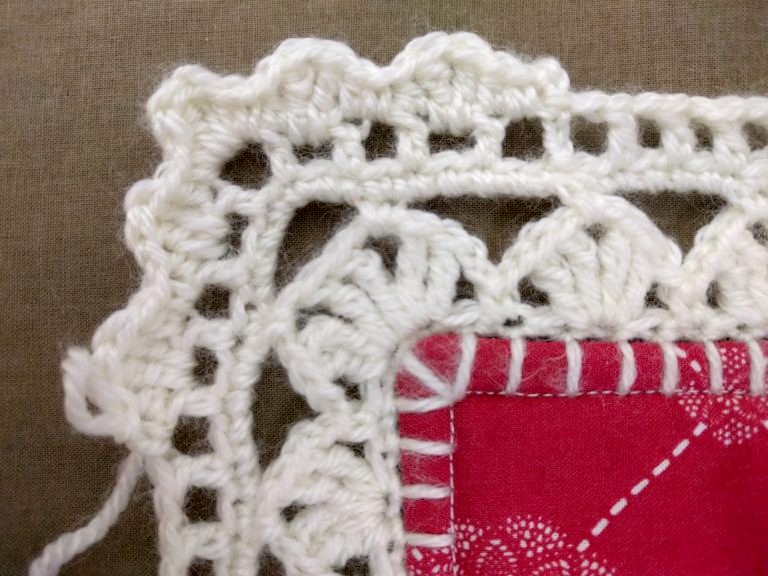
Part 5: Crocheting the Border
Row 1–Join with sc at top of first shell from corner. 5 sc in ch sp, sc in next sc. Corner [6 sc in ch 6 sp, sc in next sc.] Sides [(5 sc in ch sp, sc in next sc) x 5. Work 2 sc in ch sp, sc2tog in this sp and next, 2 sc, sc in next sc.] repeat along side. Join with sl st in beg sc.
Row 2–Sl st into next sc. Ch 4 (counts as dc, ch 1). Sides [Sk next sc, dc in next sc, ch 1] repeat to corner. Corner [dc, ch 1, sk next sc, dc, ch 3, dc, ch 1, sk next sc, dc]. Join with sl st in 3rd loop of beg ch 4.
Row 3–Ch 2 (counts as beg hdc), sc in ch 1 sp. [Hdc, 2trc in ch 1 sp, hdc, sc in ch 1 sp] repeat to corner. Corner [Hdc. In ch 3 sp work sc, hdc, 2trc, hdc, sc. Hdc in next dc, 2trc in ch 1 sp.] Join with sl st in beg hdc. Tie off. Weave in ends.
If you liked this crochet model, but want to see other patterns before starting your new piece, below we will leave some more ideas:
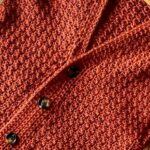
Alpine Stitch Crochet Free Pattern
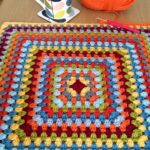
Crochet Corner To Corner Granny Square Pattern
You can find more information about this pattern at Group Facebook Crochet Made Easy
We wish all our dear readers an excellent week, full of God’s blessings in your homes, and especially a lot of creativity to start a new work of art in crochet threads.
Crocheting is so good!