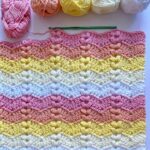
Hello dear reader, and welcome to Crochet Easy! We’re so happy you’re here in our cozy little corner of creativity. Whether you’re just picking up your first hook or exploring new textures and techniques, this space was created with you in mind. At Crochet Easy, we truly believe that every stitch tells a story.
Crochet is more than yarn and hooks — it’s about slowing down, creating something with your own hands, and finding joy in the process. Today, we’re exploring a beautiful textured technique that can instantly elevate your projects and help you grow more confident as a maker. So grab your yarn, get comfortable, and let’s learn something new together.
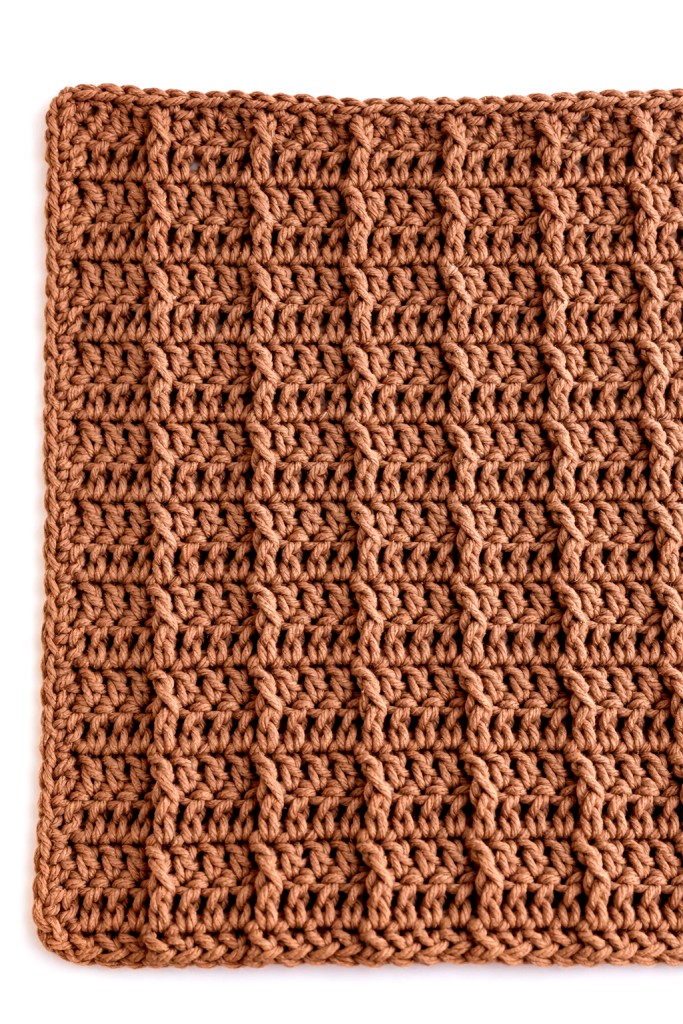
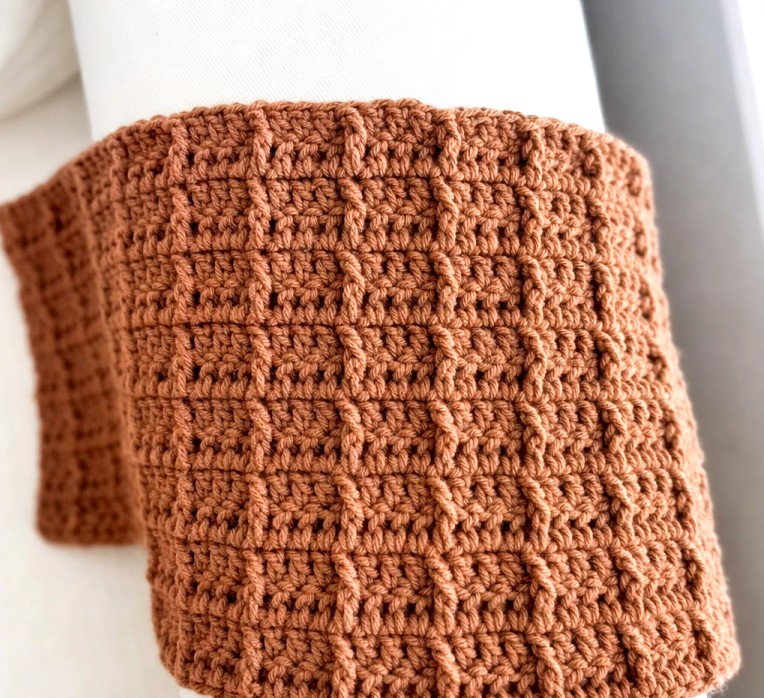
Add Beautiful Texture with the Front Post Double Crochet
Texture can completely transform a crochet project. Basic stitches are lovely on their own, but when you learn how to work around the post of a stitch, a whole new world of design possibilities opens up.
One of the most versatile and eye-catching techniques for adding dimension is the Front Post Double Crochet (FPdc).
If you’re ready to take your crochet skills to the next level and add depth to your projects, this stitch is a perfect place to start.
What Makes the Front Post Double Crochet Special?
Unlike traditional stitches that are worked into the top loops, the Front Post Double Crochet is worked around the vertical “post” of the stitch from the previous row. This small adjustment creates a raised stitch that pops forward from the fabric.
The result? A structured, textured look that adds visual interest without making the pattern complicated.
The FPdc is perfect for washcloths, blankets, scarves, sweaters, and so much more. It may look advanced, but once you understand the technique, you’ll find it surprisingly simple — and incredibly versatile.
🧶 What Is the Front Post Double Crochet?
The FPdc is simply a variation of the traditional double crochet. Instead of inserting your hook into the top loops of the stitch, you insert it around the post (the vertical stem of the stitch from the row below). This pushes the stitch outward, creating a lovely raised texture on the front of your fabric.
Materials You’ll Need
-
Crochet hook (5.5 mm / H-8 suggested)
-
Worsted-weight yarn (100% cotton is ideal for dishcloths)
-
Scissors
-
Tapestry needle for weaving in ends
Abbreviations (US Terms)
-
ch – chain
-
st – stitch
-
sc – single crochet
-
dc – double crochet
-
fpdc – front post double crochet
How to Crochet the Front Post Double Crochet (FPdc)
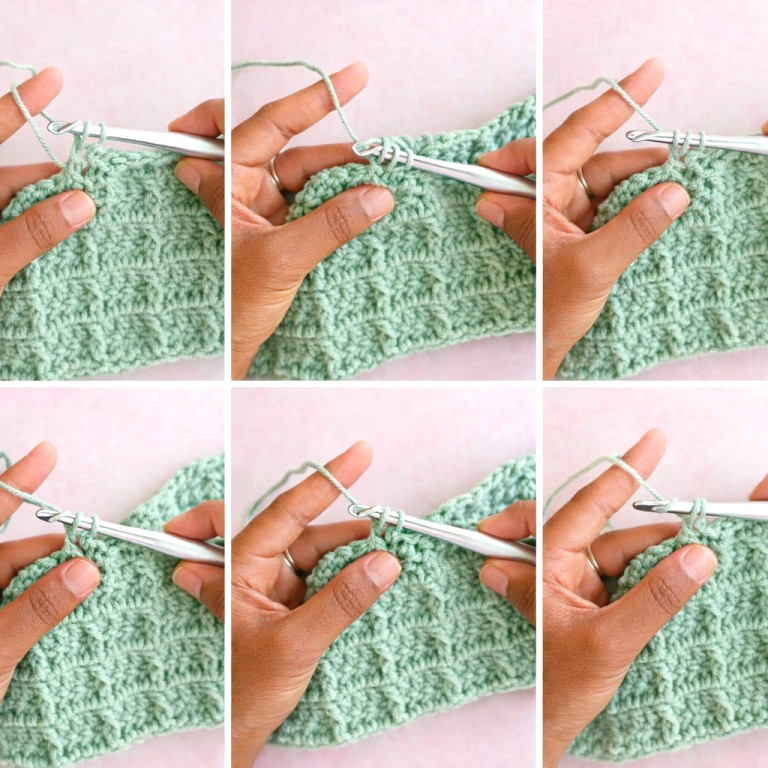
Before starting, make sure you’re comfortable with the standard double crochet stitch. The process is almost identical — the only difference is where you insert your hook.
Step-by-Step Instructions
-
Yarn over (YO).
-
Insert your hook from front to back around the post of the indicated stitch (instead of into the top loops).
-
Yarn over and pull up a loop (you’ll have three loops on your hook).
-
Yarn over and pull through two loops.
-
Yarn over and pull through the remaining two loops.
You’ve just completed a Front Post Double Crochet!
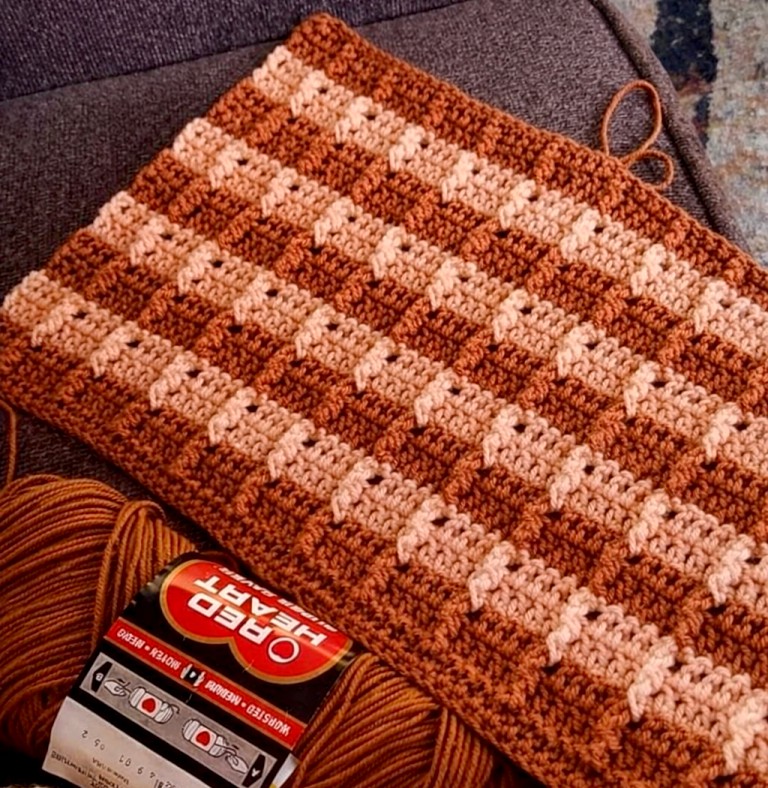
Pattern
Foundation
Chain 32. Try to keep your tension even — not too tight and not too loose — so your first row doesn’t curl.
Row 1
-
Make 1 double crochet (dc) in the second chain from your hook.
-
Continue working 1 dc in each chain across.
At the end of the row:
-
You should have 31 double crochet stitches.
-
Chain 1 and turn.
Row 2
-
Work 1 dc in each of the first 3 stitches.
Now begin the textured pattern:
-
Make 1 FPdc around the next stitch.
-
Work 1 dc in each of the next 3 stitches.
Repeat this sequence (1 FPdc, then 3 dc) across the row.
At the end:
-
You should still have 31 stitches total.
-
Chain 1 and turn.
Row 3
-
Work 1 dc in every stitch across.
You should have 31 stitches at the end.
Repeat the Pattern
Continue alternating:
-
Row 2 (textured row with FPdc)
-
Row 3 (all double crochet)
Repeat these two rows until you reach a total of 18 rows.
Finishing
Do not fasten off after completing the 18th row. Keep your yarn attached and move directly into the border.
Border Instructions
Round 1 – Simple Clean Edge
Now you’ll work around the outer edge of your project to create a neat, finished border.
-
Begin anywhere along the edge.
-
Work single crochet stitches evenly all the way around. Space them carefully so the fabric lays flat — not too tight and not too loose.
Corners
When you reach a corner:
-
Work 3 single crochet stitches into the same corner space.
This allows the fabric to turn smoothly and prevents curling.
Repeat this at each corner:
-
3 single crochet stitches in every corner space.
Closing the Round
When you’ve crocheted all the way around:
-
Insert your hook into the top of the first single crochet.
-
Make a slip stitch to join and close the round neatly.
Your border is now complete!
A Perfect Practice Project
Small projects like washcloths are ideal for practicing textured stitches. They’re quick, practical, and forgiving — which makes them perfect for experimenting.
Using cotton yarn helps define the post stitches beautifully, making the raised texture stand out even more. The finished fabric will feel slightly thicker and more structured than standard double crochet fabric.
Tips for Clean, Professional Results
-
Maintain consistent tension so the fabric doesn’t pull inward.
-
Make sure your hook goes fully around the post — not through the top loops.
-
Block your finished piece if needed to relax and even out the stitches.
With practice, the FPdc will feel smooth and natural in your hands.
Video Tutorial
Be sure to watch the wonderful video tutorial by Daisy Cottage Designs for a clear visual demonstration of this stitch in action.
The Front Post Double Crochet is one of those techniques that looks advanced but is completely achievable with just a little guidance. It adds personality, structure, and polish to any crochet project.
If you’re ready to move beyond flat stitches and explore texture and dimension, this is the perfect stitch to master next.
At Crochet Easy, we believe every new technique opens the door to creative confidence — and textured crochet is just the beginning. 💛