The Crochet Square Pattern: A Timeless Favorite for Every Crafter
If you love cozy crafts and handmade creations, the crochet square pattern is a timeless classic you’ll want to keep in your project lineup. Versatile and charming, crochet squares can be used to make everything from blankets and pillow covers to table runners and wearable pieces.
Whether you’re a beginner or an experienced crocheter, crochet squares are a perfect fit. They can be as simple or detailed as you like, offering endless opportunities to practice stitches, experiment with color, and let your creativity shine.
In this guide, we’ll walk you through everything you need to know about making crochet squares—from gathering materials to creating your first square, joining them together, and adding finishing touches. Along the way, you’ll pick up helpful tips and techniques that make the process enjoyable and rewarding.
1. What Is a Crochet Square Pattern?
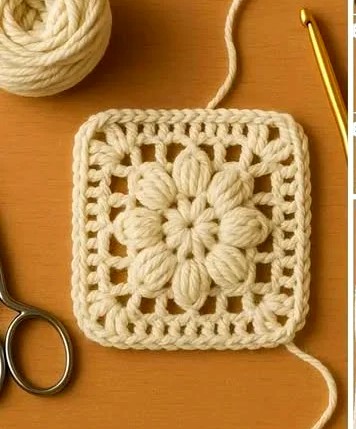
A crochet square is a small, modular piece of crocheted fabric, typically made in—you guessed it—a square shape. These squares are often created individually and then combined into larger projects like blankets, scarves, bags, or even garments. One of the most iconic examples is the granny square, beloved for its nostalgic look and colorful style.
The process usually begins in the center with a small chain loop or a magic ring. From there, you work outward in rounds, increasing your stitch count to maintain a square shape. The layered, symmetrical result is both beautiful and functional.
Crochet squares can feature a wide variety of stitches, including double crochet, half-double crochet, treble crochet, and more. Your choice of pattern and stitches will affect the texture, density, and visual complexity of the finished square.
Not only do these squares allow beginners to practice basic techniques like stitch consistency and tension control, but they also give advanced crafters the freedom to experiment with lacework, bobbles, and color changes for more intricate designs.
And because crochet squares are small and portable, they make excellent on-the-go projects—you can work on one during a commute, a coffee break, or while binge-watching your favorite show.
2. Materials and Tools You’ll Need
To start your crochet square project, you only need a few simple and affordable supplies:
-
Yarn: Choose a worsted-weight yarn in a light color if you’re a beginner—it’s easier to see your stitches. Cotton and acrylic yarns are popular choices for their durability and ease of use.
-
Crochet Hook: Use a hook that suits your yarn. For worsted weight, a 5.0 mm (H-8) hook is typically recommended, but always check your yarn label for guidance.
-
Scissors: A sharp pair of scissors is essential for clean cuts. This helps when weaving in ends or joining pieces together.
-
Tapestry or Yarn Needle: Used for weaving in loose ends and sewing squares together. Look for one with a large eye that can accommodate your yarn.
-
Stitch Markers (Optional): These are helpful for keeping track of your starting point, especially when working in continuous rounds.
-
Pattern Instructions: Whether printed or digital, make sure you have access to a reliable pattern that includes clear, step-by-step directions or charts.
3. How to Crochet Your First Square
Making your first crochet square is exciting! Here’s how to get started:
-
Start with a Slip Knot and Chain 4–5 stitches. Join the last chain to the first with a slip stitch to form a loop.
-
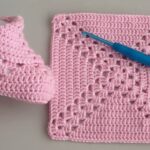
First Round: Work your stitches into the center of this loop. Most basic patterns use double crochet stitches separated by chain spaces to form the square’s corners.
-
Subsequent Rounds: Increase at each corner by placing multiple stitches in the chain spaces. This helps the square remain flat and evenly shaped.
-
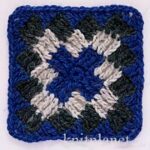
Changing Colors (Optional): To switch colors, fasten off the current yarn and join the new color with a slip stitch. Color changes can create beautiful visual effects.
-
Finishing: Once your square reaches your desired size—commonly 4″, 6″, or 12″—fasten off your yarn and weave in the ends with your tapestry needle.
Congratulations! You now have a complete crochet square ready to be joined with others.
4. Joining Crochet Squares and Final Touches
After you’ve crocheted multiple squares, it’s time to connect them into a finished piece. There are a few different methods to choose from:
-
Whipstitch: A simple sewing method where squares are placed right sides together and stitched along the edge with a yarn needle. This creates an almost invisible seam.
-
Slip Stitch Join: Done with a crochet hook, this technique creates a decorative ridge that can add texture to your project.
-
Join-As-You-Go: Instead of making all the squares first and sewing them later, this technique lets you join each square during its final round—great for saving time and achieving seamless joins.
Before joining your squares, consider blocking them. Lightly wet and pin each square to the correct shape on a flat surface, then allow them to dry completely. This helps ensure uniformity in size and shape.
Once your piece is assembled, finish with a decorative border—something as simple as a single crochet edge or a scalloped trim can add a polished look and pull the entire piece together.
TUTORIAL VIDEO
FAQ – Frequently Asked Questions
Q1: What’s the easiest crochet square for beginners?
The classic granny square is perfect for beginners. It uses simple stitches and follows a repetitive pattern that’s easy to remember.
Q2: How many squares do I need for a blanket?
It depends on the size of your squares and the blanket. A baby blanket might need around 36 six-inch squares, while a full-size afghan could require 100 or more.
Q3: Can I use leftover yarn for crochet squares?
Absolutely! This is a great way to use up scrap yarn. Just make sure the yarns are similar in weight and texture for a cohesive look.
Q4: How do I prevent my squares from curling?
Curling often results from tight tension. Try using a larger hook or blocking your squares to help them lay flat.
Q5: What’s the best way to store unfinished squares?
Store them flat in a fabric bin or ziplock bag. Keeping them pressed between books or inside a folder can help prevent distortion.
Q6: Can I sell finished items made from crochet square patterns?
In most cases, yes—as long as the pattern you’re using permits commercial use. Be sure to check the copyright or license details of any pattern you follow.
Conclusion
Crochet squares are a beloved and adaptable part of the craft, offering endless opportunities to create something beautiful. Whether you’re making a cozy granny square blanket or experimenting with new stitches and color combinations, there’s real joy in building these little squares into something meaningful.
Now that you know how to start, we hope you feel inspired to pick up your hook and yarn and begin your own crochet square journey. If this guide helped or inspired you, we’d love to hear your thoughts in the comments. Your feedback helps us grow and continue supporting the creative crochet community.
Happy crocheting!