Hello friends, and welcome to our cozy corner at Crochet Easy!
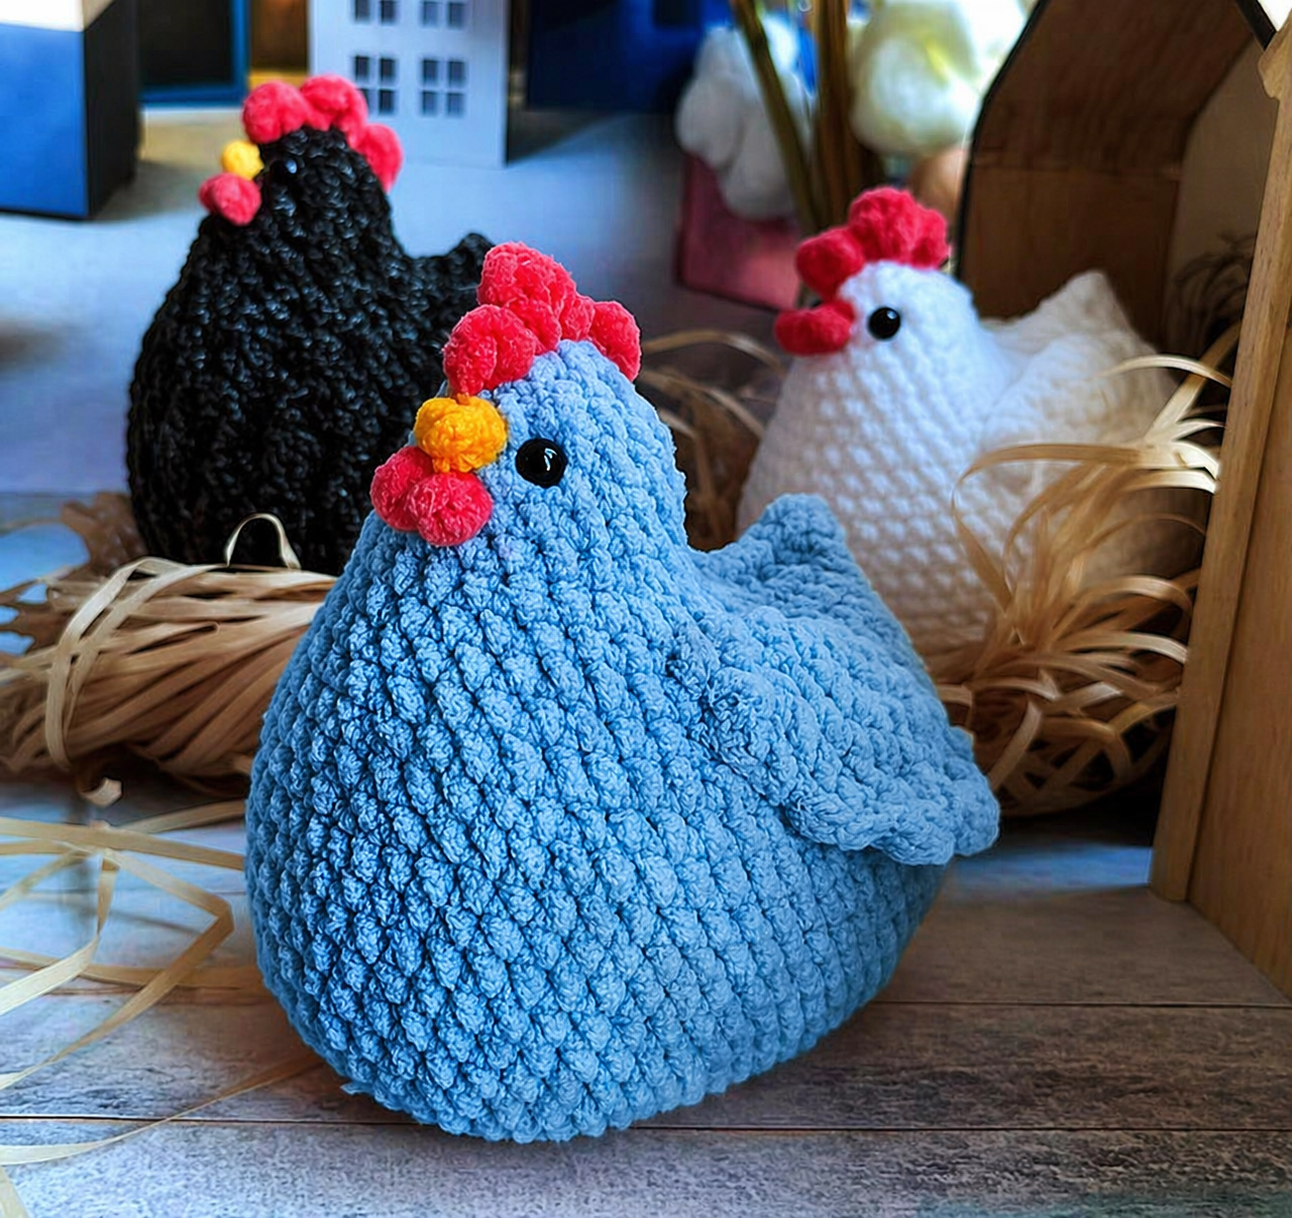
There’s something truly special about small crochet projects—especially the ones that work up quickly while still being full of charm and personality. The no-sew crochet chicken is one of those delightful creations that instantly captures attention. With its soft, round shape and adorable details, this beginner-friendly amigurumi is perfect for adding a playful and heartwarming touch to your handmade collection.
If you’re searching for a quick and satisfying project, this little chicken might just become your new favorite. At Crochet Easy, we love patterns that are simple yet rewarding, and this one checks every box. Its plush, squishy shape and minimal finishing make it ideal for anyone who wants to create something cute without feeling overwhelmed.
One of the best features of this pattern is that it’s made entirely in one piece—no sewing required! For many beginners, sewing parts together can be tricky, so this approach makes the process much more enjoyable. Using basic stitches like single crochet, increases, and decreases, you’ll work in continuous rounds to build the body. Watching your project grow from a small circle into a soft, stuffed chicken is incredibly satisfying, especially if you’re new to amigurumi.
Another great thing about this pattern is how easy it is to customize. You can completely change the look just by switching yarn types. Use plush yarn for a fluffy, cuddly chicken or cotton yarn for a cleaner, more defined finish. Small details like the comb, beak, and optional wings give each chicken its own personality. You can even play with colors to create a whole flock of unique, cheerful chickens!
This project is also a wonderful way to practice essential crochet skills. You’ll learn how to work into a magic ring, keep your tension consistent, and shape your work using increases and decreases. Since it’s a small project, it’s perfect for building confidence without investing too much time.
Skill Level
Beginner (perfect for absolute beginners)
Materials
- Worsted weight yarn (Category 4) or plush yarn
- Crochet hook (4.0–6.0 mm, depending on yarn)
- Fiberfill stuffing
- Yarn needle
- Stitch marker (highly recommended)
- Scissors
- 6–10 mm safety eyes (optional)
Abbreviations (US Terms)
MR = Magic Ring
sc = single crochet
inc = increase (2 sc in the same stitch)
dec = invisible decrease (sc 2 together)
st = stitch
sl st = slip stitch
ch = chain
dc = double crochet
rnd = round
Important Notes (Please Read First!)
- Work in continuous spirals (do NOT join rounds)
- Always mark your first stitch
- Keep your stitches tight to avoid gaps
- Stuff your project gradually as you go
- The entire chicken is made in one piece (no sewing needed)
BODY (Main Shape)
Start from the bottom and work upward.
Round 1
Make a magic ring and crochet 6 sc into it. Pull tight to close.
(6 stitches)
Beginner tip: If the magic ring feels difficult, chain 2 and work 6 sc into the first chain.
Round 2
Increase in every stitch (2 sc in each stitch).
(12 stitches)
Round 3
(1 sc, inc) repeat around.
(18 stitches)
Round 4
(2 sc, inc) repeat around.
(24 stitches)
Round 5
(3 sc, inc) repeat around.
(30 stitches)
At this stage, your work should look like a small bowl.
Rounds 6–10
sc in each stitch around.
(30 stitches for 5 rounds)
This builds the height of your chicken.
Add Eyes (Optional)
Place safety eyes between rounds 7 and 8, about 5–6 stitches apart. Make sure they’re centered before securing.
Start Stuffing
Add stuffing little by little, shaping it into a soft, slightly oval form.
Round 11
(3 sc, dec) repeat around.
(24 stitches)
Round 12
(2 sc, dec) repeat around.
(18 stitches)
Add more stuffing before the opening becomes too small.
Round 13
(1 sc, dec) repeat around.
(12 stitches)
Round 14
Decrease in every stitch.
(6 stitches)
Closing (No-Sew Finish)
Cut the yarn, leaving a tail.
Using a yarn needle, weave through the front loops of the remaining stitches and pull tight to close.
Secure and weave in the end.
Your body is now complete!
COMB (Top of Head)
Attach red yarn at the top center of the head.
In the same stitch:
(ch 2, 2 dc, sl st)
Move to the next stitch and repeat 2–3 times, depending on your desired size.
Fasten off and hide the ends.
BEAK (Embroidery)
Using orange or yellow yarn:
- Insert needle between the eyes
- Make 2–3 small horizontal stitches
- Gently pull to form a small triangle
Keep it simple—less is more!
OPTIONAL WINGS
Option 1 (Embroidered):
Make 2–3 curved stitches on each side.
Option 2 (Crocheted):
Attach yarn to the side:
ch 2, 2 dc, sl st in the same stitch
Fasten off
OPTIONAL DETAILS
- Add blush using yarn or makeup
- Embroider sleepy eyes instead of using safety eyes
- Add a small tail (similar to the comb but smaller)
Finished Size
- Approximately 8–12 cm with worsted yarn
- Larger if using plush yarn
Troubleshooting Tips
- Chicken looks pointy: Add more stuffing
- Holes between stitches: Use a smaller hook
- Uneven shape: Double-check your stitch count
- Twisting or leaning: Normal when working in spirals
Tutorial Video
You’ve now created your very own adorable crochet chicken!
In the end, this no-sew crochet chicken is more than just a cute project—it’s a fun and relaxing way to build your crochet skills. Whether you’re making it as a gift, decoration, or just for yourself, it’s sure to bring a smile. Here at Crochet Easy, we believe every stitch is part of your creative journey, and we’re so happy to be part of it. 💛