Welcome to Crochet Easy! Today I’m excited to share a beautiful and practical crochet project that’s perfect for beginners: the Basic Car Seat Tent. This cozy accessory is designed to help protect your little one from wind, sun, and chilly weather while on the go—all while adding a stylish handmade touch.
The pattern uses simple stitches and creates a lovely textured fabric, making it an enjoyable project whether you’re new to crochet or have years of experience. It’s also a thoughtful handmade gift for baby showers or new parents.
Crochet Car Seat Tent Pattern
Materials Needed
-
Worsted weight yarn in your chosen colors
-
Crochet hook suitable for your yarn (typically 5 mm / H)
-
Scissors
-
Yarn needle for weaving in ends
-
Buttons for handle straps (optional)
Abbreviations (U.S. Terms)
-
sc – single crochet
-
dc – double crochet
-
fpdc – front post double crochet
-
bpdc – back post double crochet
-
sl st – slip stitch
-
sk “x” st(s) – skip “x” stitch(es)
-
rep – repeat
-
beg – beginning
Special Stitch
Seed Cluster: (sc, dc) worked into a single sc stitch
Gauge / Tension
Working in pattern:
3 seed clusters x 5 rows = 2” x 2”
Pattern Multiple
Multiple of 2 + 1
Pattern Overview
The main body of the car seat tent is worked vertically, which gives the fabric a unique texture and beautiful drape. You may begin with a traditional chain or use a chainless foundation for smoother edges and more even tension.
Main Body
Note:
You may either:
-
Chain 81 and begin with Row 1, or
-
Start with a chainless foundation alternating sc and dc to the end, finishing with a dc.
You should have 80 stitches total (40 sc and 40 dc). If using a chainless foundation, skip Row 1 and begin with Row 2.
With main color (MC), loosely ch 81.
Row 1:
Sc in 2nd ch from hook, dc in next ch, sc in next ch, dc in next ch; repeat from * to * across. Ch 1, turn.
Row 2:
Skip dc, (sc, dc) in sc, skip dc; repeat across. Ch 1, turn.
Rows 3–55 (or desired length):
Repeat Row 2.
Do not fasten off at the end of Row 55. Turn the work 90 degrees clockwise to begin working along the side edges.
Edging
Round 1:
Ch 1. Work 1 sc into the top of the last dc from Row 55, then another sc into the second half of the same dc. Work 2 sc into each dc along the edge (do not place stitches between dc posts).
In each corner, work 3 sc. Continue evenly around all edges.
Join with a sl st to the first sc and fasten off.
Round 2: (Stitch count does not need to be exact.)
Join a new color into the second sc of any corner. Ch 3 (counts as hdc + ch 1).
Work (hdc, ch 1) in the same stitch.
Continue the pattern of (hdc, ch 2, skip 2 sts) around, adjusting near corners as needed.
Join with a sl st to the second chain of the beginning ch 3. Ch 1, turn.
Round 3:
Sc in the same stitch. Work sc stitches into each hdc and chain space, placing 3 sc in corner chain-1 spaces and 2 sc in chain-2 spaces as established.
Join with a sl st to the first sc, fasten off, and turn.
Rounds 4–6:
Join a new color in the second sc of any corner.
Ch 1, sc evenly around, placing 3 sc in each corner stitch.
Join, fasten off, and turn.
Rounds 7–10:
Continue in the same color as Round 6.
Repeat Round 4, adjusting as needed so there is 1 sc in each stitch and 3 sc in each corner.
Chain Ribbon / Bow
Ch 40 loosely. This forms the beginning of the ribbon that will tie into a bow.
Round 1:
Attach the chain at the center bottom edge of the tent and work sc and chain spaces around the lower edge, following the established hdc placement and spacing.
Round 2:
Continue working around the ribbon to create a second pass.
At the end, ch 41, fasten off, and pull the yarn tail securely.
Tie the beginning and ending chains together to form a bow.
Handle Straps (Make 2)
Row 1:
Join yarn at desired strap location. Ch 1, sc in same st and in next 3 sts. Ch 2, turn.
Row 2:
Hdc in next 3 sts. Ch 2, turn.
Rows 3–14:
Repeat Row 2.
Row 15:
Ch 1, sc in same st and in next 3 sts. Ch 1, turn.
Row 16 (Buttonhole):
Sc in same st, ch 2, skip 2 sts, sc in last st. Ch 1, turn.
Row 17:
Sc in same st, 2 sc in ch-2 space, sc in last st. Fasten off.
Weave in all ends.
Finishing Touches
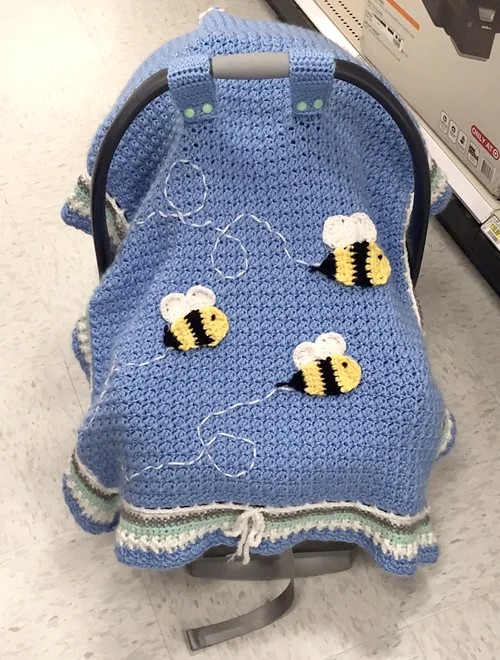
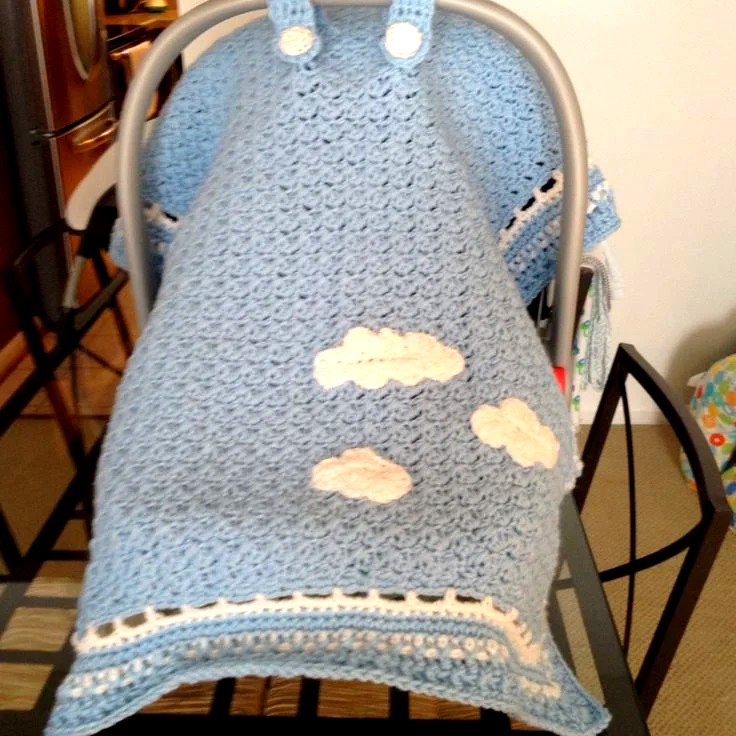
Once your car seat tent is complete, feel free to personalize it with appliqués or decorative details. The chain ribbon doubles as both a bow and a tie, allowing you to neatly secure the tent when it’s folded and not in use.
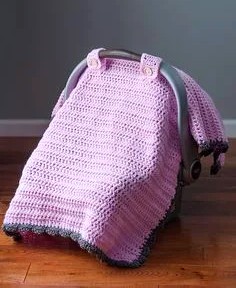
This Basic Car Seat Tent is a practical and charming project that blends comfort, style, and creativity. Whether you’re making it for your own baby or gifting it to someone special, it’s sure to be treasured.
Happy crocheting! 🧶