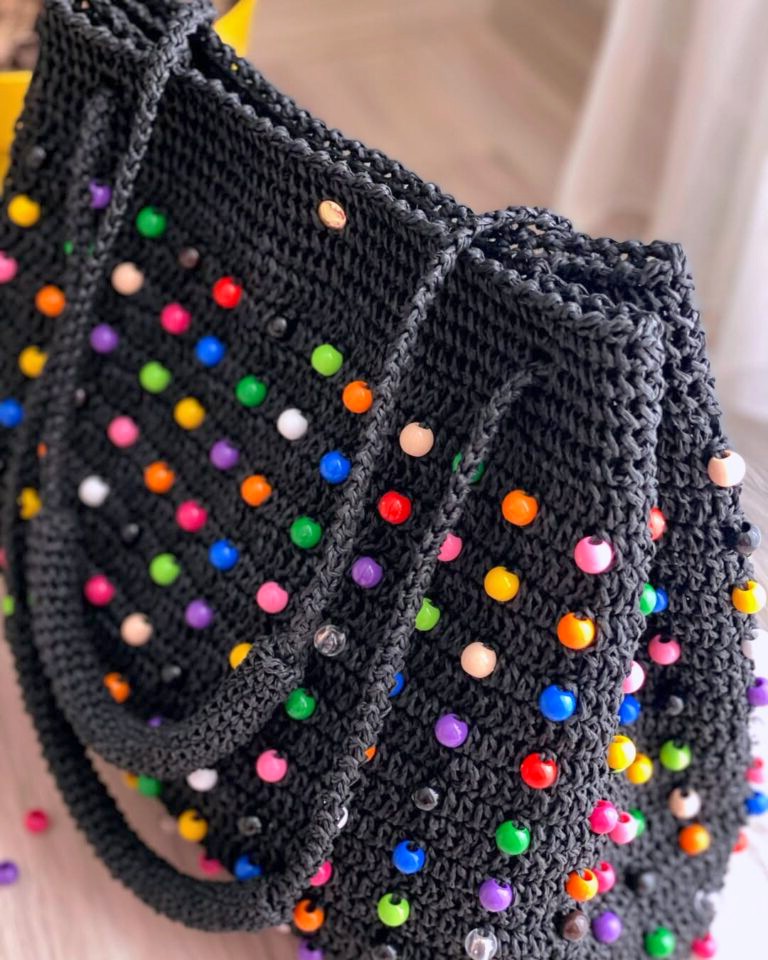
Are you ready to add a standout piece to your handmade wardrobe? Today, I’m excited to share this beautiful and practical Beaded Crochet Handbag. The design was inspired by a bag I discovered on Pinterest, but I’ve added my own personal touches to make it truly unique. Not only is this bag visually striking, but it’s also sturdy enough for everyday use.
Whether you’re heading out for a casual day, visiting a summer market, or simply looking to elevate your outfit with a handmade accessory, this project is a perfect choice. Thanks to the combination of colorful beads and structured paper yarn, the bag offers a lovely balance of charm, texture, and durability.
This step-by-step tutorial is ideal for intermediate crocheters or confident beginners who are ready to explore new techniques, such as working with beads, crocheting a flat rectangular base, and creating strong, functional handles.
Beaded Crochet Handbag
🧶 Materials Needed
-
Paper yarn or sturdy cotton cord (choose the thickness you prefer)
-
Beads of your choice (multi-colored or a single shade)
-
3 mm or 4 mm crochet hook (adjust according to yarn thickness)
-
Stitch markers
-
Scissors
-
Tapestry needle (for weaving in ends and sewing handles)
-
Snap fasteners (optional, for closure)
-
Lining fabric (optional)
📏 Finished Size
-
Approximately 35 cm (height) × 35 cm (width when folded)
-
Base measures about 45 cm wide when laid flat
You can easily customize the size by adjusting the starting chain length and the number of rounds worked.
🪡 Crochet Abbreviations
-
ch = chain
-
sc = single crochet
-
dc = double crochet
-
sl st = slip stitch
-
fsc = false single crochet (explained below)
-
blo = back loop only (optional in certain steps)
🪢 Step 1: Creating the Rectangular Base
Foundation Chain
Start with 45 chains for a medium-sized bag or 36 chains for a smaller version. Adjust as needed depending on your yarn thickness and desired size.
First Round
Work 1 sc into each chain across. In the last chain, make 3 sc in the same stitch to form the first corner. Place a stitch marker in the middle stitch of this corner.
Working the Other Side
Continue along the opposite side of the foundation chain, placing 1 sc in each stitch. At the starting end, work 3 sc into the same stitch to create the second corner and place another stitch marker.
Building the Base
Work in a continuous spiral without joining rounds. At each corner marker, always increase by making 3 sc in the same stitch. Continue crocheting until you complete 10 rounds, or until the base reaches your desired size.
Finishing the Base
Fasten off neatly. For a smoother, flatter finish, you may lightly steam-iron the base from the inside.
🪡 Step 2: Building the Bag Body with Beads
Starting the First Round
Begin using the false single crochet (fsc) technique: chain 2, yarn over, and pull through all loops at once. This creates a firm, structured stitch. Place a stitch marker at the beginning of the round to help track your progress.
Bead Pattern (Repeat the Following Sequence)
-
Row 1 – Beaded False Single Crochet:
Work 4 fsc, then slide a bead up your yarn and crochet the next stitch, securing the bead in place. Repeat this 4 fsc + 1 bead pattern around the round. -
Row 2 – Double Crochet:
Work 1 dc in each stitch around. No beads in this round. -
Row 3 – False Single Crochet:
Work 1 fsc in each stitch, without beads. -
Row 4 – Beaded Round:
Repeat the beaded pattern from Row 1.
Continue repeating this 4-row sequence until the bag reaches your preferred height. For reference, the original version includes 10 bead rows, but this can be adjusted.
🧵 Step 3: Creating the Bag Opening and Handle Holes
Final Height Adjustment
Once you’ve completed your bead rows, work one additional dc round if needed, or skip this step if the height feels right.
Bag Opening Edging
Crochet 2 rounds of false single crochet around the top edge. Use stitch markers to mark where you want the handles to be positioned.
Handle Holes
On the next round, when you reach a handle marker, chain 2, skip 2 stitches, and continue crocheting. Repeat for each handle position, creating four holes total (two at the front and two at the back).
Finishing the Edge
After the handle holes, crochet 2 more rounds of single crochet. For the final touch, work a reverse single crochet (crab stitch) around the entire opening to give the bag a firm, decorative finish.
TUTORIAL VIDEO
This tutorial video from channel ‘Passionate Crafter’