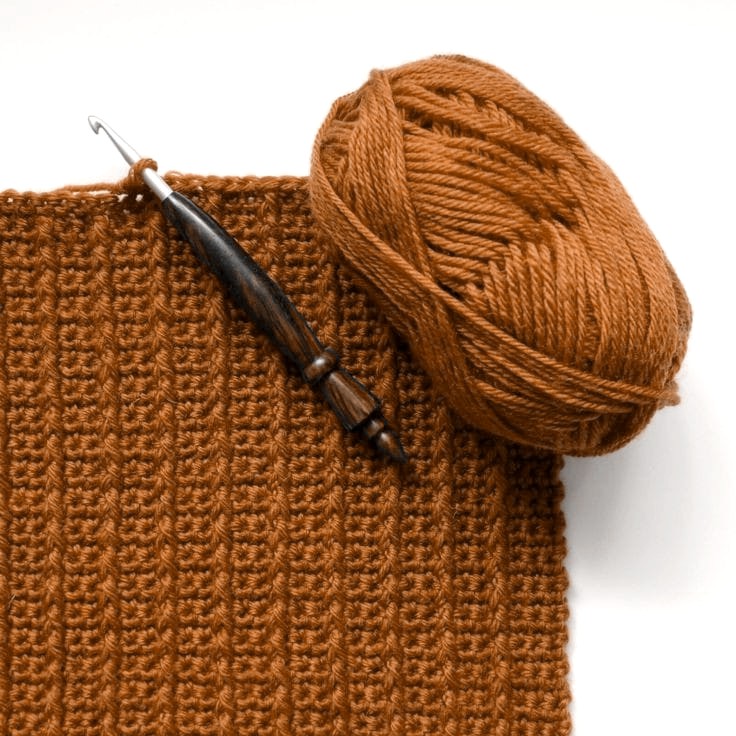
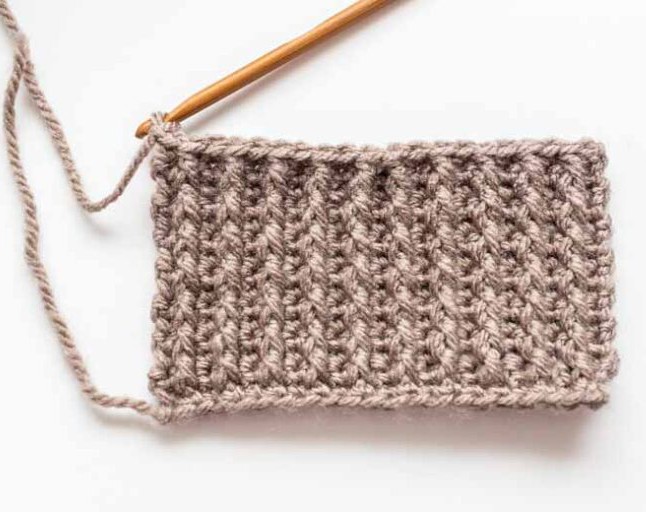
Calling all crochet lovers! If you’re ready to add a fresh, textured twist to your projects, the Bar Stitch is a must-try. Also known as the Crossed Double Crochet, this eye-catching stitch creates a unique pattern of horizontal “bars” that add depth and dimension to your fabric. Whether you’re new to crochet or an experienced maker looking to expand your skills, the Bar Stitch is a versatile technique worth mastering.
In this guide, we’ll break down everything you need to know—from materials and stitches to detailed step-by-step instructions. Let’s get started!
What Is the Bar Stitch?
The Bar Stitch is created by working front post double crochets (FPDC) into stitches two rows below your current working row. This crossing technique forms a bold, woven texture that works beautifully for scarves, blankets, sweaters, and more.
Materials You’ll Need
To get started with the Bar Stitch, gather the following beginner-friendly tools and materials:
Tools:
-
Size H/5.0 mm crochet hook
-
Yarn needle (for weaving in ends)
-
Scissors
Yarn:
-
Scrap yarn or one skein of medium (worsted) weight yarn
(Tip: Use a lighter color so you can see your stitches clearly.)
Optional: A slightly larger hook may help if you’re just learning.
Crochet Stitches and Abbreviations Used
Before jumping into the pattern, here’s a quick refresher on the stitches you’ll use:
-
Slip Knot: Loop the yarn around your fingers, insert the hook, and pull tight.
-
CH (Chain): Yarn over and pull through the loop on the hook.
-
SC (Single Crochet): Insert hook into stitch, yarn over, pull through (2 loops on hook), yarn over again and pull through both loops.
-
FPDC (Front Post Double Crochet): Yarn over, insert the hook from front to back around the post of a stitch two rows below, yarn over and pull through. Complete the double crochet as usual.
How to Crochet the Bar Stitch
Let’s walk through the rows step-by-step. This stitch is worked in multiples of 2.
Foundation:
-
Chain any even number of stitches.
Row 1:
-
SC in the 2nd chain from the hook, then SC in each stitch across.
-
CH 1 and turn.
Row 2:
-
SC in each stitch across.
-
CH 1 and turn.
Row 3:
-
SC in the first stitch.
-
FPDC around the 2nd SC from Row 1 (not the previous row).
-
SC in the next stitch.
-
FPDC around the next SC from Row 1.
-
Repeat this pattern (SC, FPDC two rows below) across.
-
End with an SC.
-
CH 1 and turn.
Row 4:
-
SC in each stitch across.
-
CH 1 and turn.
Row 5 (Repeat of Row 3 with a new base row):
-
SC in the first stitch.
-
FPDC around the 2nd SC from two rows below (now Row 3).
-
SC in next stitch.
-
FPDC around next SC from two rows below, and so on.
-
End with an SC.
-
CH 1 and turn.
Row 6:
-
SC across.
-
CH 1 and turn.
Repeat Rows 5 and 6 to build your fabric. As you go, you’ll see the elegant bar-like texture forming!
Tips & Project Ideas
-
Use this stitch for scarves, cowls, baby blankets, pillows, or even modern sweaters.
-
Try color changes every few rows to make the bar texture pop.
-
Use a soft cotton or acrylic blend for a cozy, textured feel.
Wrap-Up: Why You’ll Love the Bar Stitch
The Bar Stitch offers a perfect balance of visual flair and beginner accessibility. It adds structure and style to any project while helping you practice key techniques like front post stitches and reading stitch placement from earlier rows.
So grab your yarn, hook, and a comfy seat—you’re about to fall in love with this textured favorite!