That sounds like a great start to a crochet tutorial! Are you looking to expand on this with detailed step-by-step instructions, images, or perhaps variations of the shell stitch? Let me know how you’d like to proceed! 😊
Below is a step‐by‐step tutorial on how to crochet the classic shell stitch pattern. This pattern is not only versatile but also adds a textured, decorative touch to any project—from blankets and scarves to home decor items.
Required Materials
Yarn: It is recommended to use a Canbebe anti-pilling yarn.
Hook: A 3 mm crochet hook is used (can be adjusted according to the yarn type).
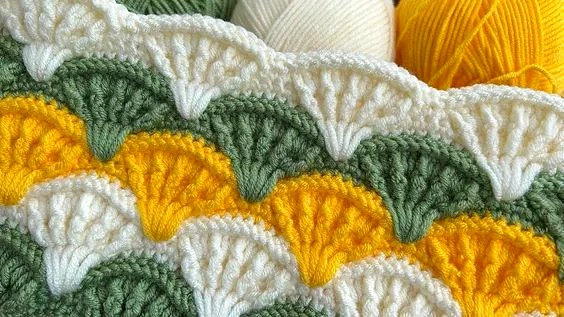
Crochet Shell Pattern Tutorial
Step 1: Starting with a Chain
Make a foundation chain based on the project size you want. It should be neither too tight nor too loose.
Skip the first chain, insert the hook into the second chain, pull up a loop, and complete a single crochet.
Continue with 4 single crochets along the chain.
Step 2: Creating the Shell Motif
Yarn over, skip 3 chains, and insert the hook into the 4th chain.
Make 5 double crochets in the same stitch.
Skip 3 chains, insert the hook into the 4th chain, and make a single crochet.
Make 7 single crochets across the next stitches.
Yarn over, skip 3 chains, and insert the hook into the 4th chain. Make 5 double crochets in the same stitch.
Repeat these steps until the end of the row, finishing with 4 single crochets.
Step 3: Working Around the Posts of the Double Crochets
Chain 1 and turn your work.
Make 3 single crochets (skip the first stitch).
Insert the hook around the post of the first double crochet from the previous row and make a front post double crochet.
In the next space, make a double crochet.
Again, insert the hook around the post of the next double crochet and make a front post double crochet.
Repeat this step for all double crochets in the row.
Skip the first of the 7 single crochets, then make 5 single crochets.
Continue working around the post of each double crochet in the same manner.
Step 4: Repeating and Shaping the Pattern
Reduce the 5 single crochets from the previous row to 3 single crochets (by skipping the first and last stitch).
Continue making front post double crochets around the double crochets.
In the next row, reduce the 3 single crochets to 1 single crochet while maintaining the front post double crochet pattern.
At this stage, the pattern will start becoming more defined.
Repeat the initial steps to form additional rows.
Finalizing the Pattern
The pattern will create a beautiful 3D effect.
As you continue crocheting, the motifs will develop into a textured shell pattern.
Once the desired size is achieved, add a finishing row of single crochets or another decorative border if preferred.
Tips
Changing the yarn and hook size can create different effects.
The pattern repeats itself in a diagonal manner.
To keep the pattern even and neat, pay attention to balancing the single crochets and double crochets.
Video Tutorial:
The crochet shell stitch is a must-have in every crocheter’s skill set! Whether you’re working on a delicate scarf or a cozy, intricate blanket, this stitch adds a touch of elegance and texture with minimal effort. Its versatility makes it perfect for both simple and elaborate projects. Give it a try today and see how effortlessly beautiful the shell stitch can be!
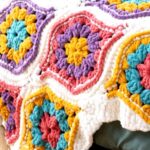
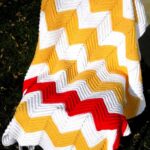
If you liked this crochet model, but want to see other patterns before starting your new piece, below we will leave some more ideas:
Alpine Stitch Crochet Free Pattern
Crochet Corner To Corner Granny Square Pattern
You can find more information about this pattern at Group Facebook Crochet Made Easy
Happy crocheting! Let your creativity shine with this versatile and comforting pattern.