Crochet Easy Snowflake Tutorial for Beginners
Crochet snowflakes are among the most beautiful and timeless handmade decorations you can create. They’re perfect for hanging on a Christmas tree, decorating gifts, or stringing together into festive garlands. This Crochet Easy Snowflake project is simple, relaxing, and ideal for beginners. The tutorial walks you through each step at a gentle pace, allowing you to enjoy every stitch while creating something light, delicate, and elegant.
One of the best things about this crochet snowflake is its versatility. You can make it small and subtle or large and eye-catching just by changing your yarn or hook size. Although the finished design looks intricate, it’s surprisingly easy to make thanks to repeating stitches and a straightforward structure. Once you understand how the snowflake is built, you can easily adapt it and even design your own variations.
In this guide, you’ll find clear step-by-step instructions, a complete materials list, helpful shaping tips, and creative ideas for customizing your snowflake. By the end of the tutorial, you’ll feel confident enough to make several snowflakes—not only for the holidays, but for handmade décor all year long.
Materials You’ll Need
To get started with this Crochet Easy Snowflake, you only need a few basic supplies. This crochet pattern doesn’t require anything fancy or expensive, making it perfect for beginners and budget-friendly crafting. You may already have most of these items in your crochet kit.
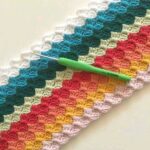
You can use cotton yarn, acrylic yarn, crochet thread, or even glitter yarn for extra sparkle. Cotton yarn is especially beginner-friendly because it holds its shape well and provides clear stitch definition. Your hook size will depend on how delicate or bold you want your snowflake to be, but smaller hooks usually create a tighter, more refined look.
In addition to yarn and a hook, you’ll need scissors, a yarn needle, and optional stiffening supplies such as fabric starch or a glue-and-water mixture. These help your snowflake keep its shape once finished. If you plan to hang your snowflake, prepare a ribbon, string, or clear thread for a hanging loop.
Understanding the Snowflake Structure
Every crochet snowflake starts with a small center worked in the round. From that center, each arm extends outward using repeating stitch patterns. This repetition makes the crochet pattern easy to memorize—once you complete one arm, the rest follow the same steps. It’s a great confidence booster for anyone learning to crochet in the round.
This project uses only basic crochet stitches: chains, double crochet, single crochet, slip stitches, and picots. If you’re familiar with these stitches, you can complete this snowflake with ease. The design is built layer by layer, forming classic snowflake points through simple stitch placement rather than complicated techniques.
Despite its delicate appearance, this crochet snowflake is beginner-friendly and quick to finish. It’s also an excellent introduction to decorative crochet motifs and a perfect stepping stone toward more advanced projects like doilies, appliqués, and lace designs.
Step-by-Step Crochet Tutorial
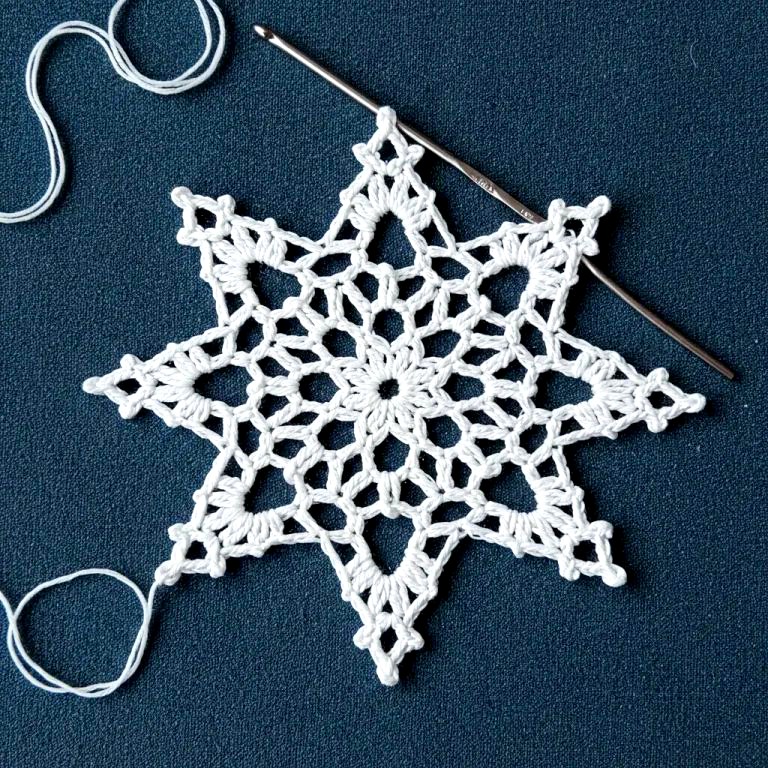
Begin your Crochet Easy Snowflake by making a slip knot and chaining 6. Join the chain into a ring with a slip stitch. This ring forms the base of your snowflake. Chain 3 to count as your first double crochet, then work 11 more double crochets into the ring. When you have 12 stitches total, join the round with a slip stitch.
For the next round, chain 4 and skip one stitch. Single crochet into the next stitch, chain 4 again, and repeat this sequence around the circle. You should create six chain spaces, which will become the anchor points for the snowflake arms. Join with a slip stitch into the first chain space.
Now work into each chain space separately. Chain 3, work 2 double crochets, chain 3 again, and slip stitch into the same space to form a pointed tip. Repeat this process in all six chain spaces. As you continue, the snowflake shape will become clearly visible. Once all arms are complete, join with a slip stitch, fasten off, and weave in your ends using a yarn needle.
Shaping and Stiffening Your Snowflake
After finishing your snowflake, it may appear soft or slightly curled—this is completely normal. To achieve the crisp, classic snowflake look, blocking and stiffening is highly recommended. This final step helps your crochet pattern hold its shape beautifully over time.
Lay your snowflake flat on a blocking mat or foam board and gently stretch each point outward. Pin each tip so the snowflake forms an even, symmetrical shape. Next, prepare a stiffening solution using equal parts white glue and water, or use liquid fabric starch. Apply it evenly with a small brush or your fingers, making sure all loops and points are coated.
Allow the snowflake to dry fully before removing the pins. Drying time can vary depending on humidity, but overnight is usually sufficient. Once dry, your snowflake will be firm, crisp, and ready to display.
Creative Ideas for Personalizing Your Snowflake
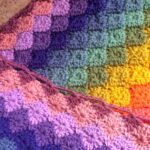
One of the joys of this crochet pattern is how easy it is to personalize. Simple changes can give each snowflake its own unique look. Try experimenting with different colors such as icy blue, silver, gold, or traditional white. Metallic or glitter thread adds a subtle shimmer that’s perfect for winter décor.
You can also change the size of your snowflake by using different yarn weights and hook sizes. Fine thread and a small hook create tiny, delicate snowflakes ideal for cards or ornaments, while thicker yarns produce bold designs perfect for garlands or window decorations.
For extra flair, consider adding beads or sequins to the tips of your snowflake. This small detail adds sparkle and elegance, especially under holiday lights. A ribbon loop turns your snowflake into a tree ornament, while multiple snowflakes joined together create a beautiful handmade banner.
Finishing Touches and Display Ideas
Once your snowflake is shaped and personalized, it’s time to display it. Many crocheters love hanging snowflakes near windows using clear thread so sunlight can shine through them. Others use them as unique gift toppers that recipients will cherish long after the holidays.
Crochet snowflakes also make stunning table decorations. Scatter them across a festive table, attach them to napkin rings, or frame them in shadow boxes for a modern decorative touch. Layering two snowflakes of different sizes creates a lovely three-dimensional effect with very little extra effort.
No matter how you choose to use them, your crochet snowflakes will add warmth, creativity, and handmade charm to any space.
Share Your Crochet Easy Snowflake
Now that you’ve completed your Crochet Easy Snowflake, don’t hesitate to share your beautiful creation. Handmade snowflakes bring joy to the crochet community and inspire others to pick up a hook. Whether you display them at home, gift them to loved ones, or share them online, your work deserves to be seen.
Tutorial Video
If this tutorial helped you learn something new, try making a few more snowflakes to practice your stitches. Each one will become quicker and easier, and before you know it, you’ll have a lovely collection ready for decorating or gifting.
Thank you for crocheting along with this tutorial. May your stitches stay smooth, your creativity shine bright, and your snowflakes spread joy wherever they go. Happy crocheting! 🧶❄️