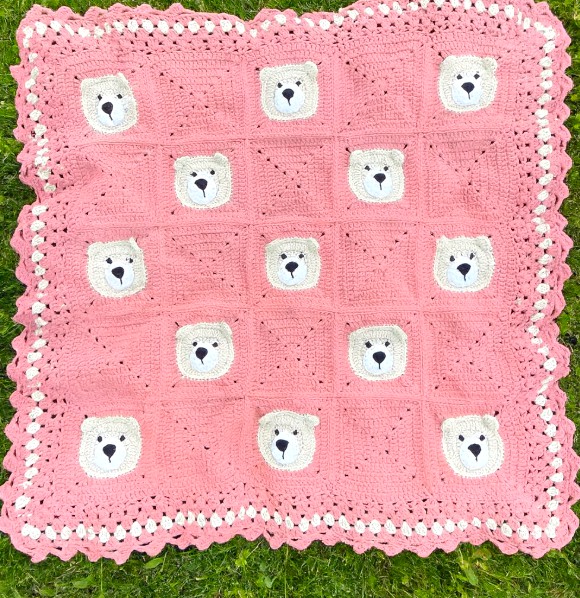
If you’re searching for a blanket that’s just as cute as it is comforting, the Bear Blanket Crochet Pattern is a wonderful choice. Featuring adorable bear face squares paired with classic solid squares, this blanket is designed to be both playful and timeless. It makes a thoughtful baby shower gift, a charming nursery accent, or a cozy throw for a child’s bedroom.
This project offers a lovely mix of techniques, combining textured motif work with traditional granny-style squares to keep the process enjoyable from start to finish. Best of all, the design is fully customizable—experiment with soft neutrals, gentle pastels, or bold color combinations to match your personal style or nursery theme.
Materials
-
4 mm crochet hook
-
3.5 mm crochet hook (for smaller details)
-
Baby-friendly yarn in three colors
-
Example:
-
Color 10 – bear face
-
Color 1 / B – background and border
-
Color 2 – embroidery details
-
-
-
Tapestry needle (for sewing and weaving in ends)
-
Scissors
Stitches & Abbreviations (US Terms)
-
ch = chain
-
sl st = slip stitch
-
sc = single crochet
-
hdc = half double crochet
-
dc = double crochet
-
dc2tog = double crochet two together
-
sp = space
-
rep = repeat
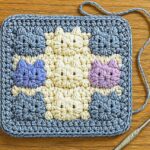
Bear Square Pattern
Each bear square is worked individually. The bear’s head, ears, snout, and nose are crocheted separately and then sewn onto a square background.
Bear Square – Crochet Instructions
Bear Head
Using a 4 mm hook and Color 10, start with a magic ring.
Round 1: Ch 3 (counts as dc), 11 dc into the ring, sl st to the third ch of the beginning ch-3. (12 dc)
Round 2: Ch 3, dc in the same st, 2 dc in each st around, sl st to join. (24 dc)
Round 3: Ch 3, dc in the same st, *dc in next st, 2 dc in next st; rep from * around, sl st to join. (36 dc)
Round 4: Ch 3, dc in the same st, *dc in next 2 sts, 2 dc in next st; rep from * around, sl st to join. (48 dc)
Round 5: Ch 1, sc in next st, *sl st in next st, sc in next st; rep from * around. Fasten off Color 10. (48 sts)
Join Color 1 to any corner ch-2 space.
Round 6: Ch 3 (counts as dc), (dc, ch 2, 2 dc) in same sp, *dc in next 12 sts, hdc in next 2 sts, sc in next 10 sts, hdc in next 2 sts, dc in next 12 sts, (2 dc, ch 2, 2 dc) in next corner sp; rep from * twice, sl st to join.
Round 7: Sl st in next st, (sl st, ch 3, dc, ch 2, 2 dc) in corner sp, *dc in next 18 sts, hdc in next 2 sts, sc in next 16 sts, hdc in next 2 sts, dc in next 18 sts, (2 dc, ch 2, 2 dc) in corner sp; rep from * twice, sl st to join.
Round 8: Sl st in next st, (sl st, ch 3, dc, ch 2, 2 dc) in corner sp, *dc in next 22 sts, hdc in next 2 sts, sc in next 20 sts, hdc in next 2 sts, dc in next 22 sts, (2 dc, ch 2, 2 dc) in corner sp; rep from * twice, sl st to join.
Fasten off.
Inner Ears (Make 2)
Using a 3.5 mm hook and Color 9, make a magic ring.
Round 1: 3 sc into the ring. (3 sc)
Fasten off and sew the ears to the top of the head.
Snout
Using a 3.5 mm hook and Color 4, make a magic ring.
Round 1: 6 sc into ring. (6 sc)
Round 2: 2 sc in each st around. (12 sc)
Round 3: *2 sc in next st, sc in next st; rep from * around. (18 sc)
Round 4: *sc in next 2 sts, 2 sc in next st; rep from * around. (24 sc)
Round 5: *sc in next 3 sts, 2 sc in next st; rep from * around. (30 sc)
Fasten off.
Nose
Using a 3.5 mm hook and Color 2, make a magic ring.
Round 1: 6 sc into ring. (6 sc)
Fasten off.
Finishing the Bear Face
-
Sew the nose onto the snout.
-
Attach the snout to the center of the bear’s face.
-
Embroider the eyes and mouth using Color 2.
-
Secure the inner ears in place if not already attached.
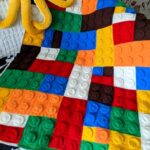
Solid Squares
You will need 12 solid squares to complete the blanket.
👉 The solid square pattern can be found via the link on our website.
Blanket Layout
-
13 Bear Squares
-
12 Solid Squares
Arrange the squares in a 5 × 5 layout, alternating bear and solid squares for a balanced look.
Joining the Squares
There are many ways to join crochet squares, such as whip stitch, slip stitch join, or join-as-you-go. For this blanket, choose a method that creates flat, neat seams so the blanket drapes smoothly.
-
Arrange the squares into 5 rows of 5.
-
Join squares into rows first, then join the rows together.
-
Double-check that all bear faces are facing the correct direction before joining.
Border Instructions
Finish your blanket with a 7-round border for a clean, polished edge.
Using Color B
Round 1:
(3 dc, ch 2, 3 dc) in corner sp, dc in each st across to next corner, working dc2tog across seam joins; repeat around, sl st to join.
Round 2:
Sl st to corner sp, (3 dc, ch 2, 3 dc) in corner, skip next 2 sts, V-st in next st; repeat around, sl st to join.
Round 3:
Sl st to corner sp, (3 dc, ch 2, 3 dc) in corner, ch 1, 3 dc in each V-st, ch 1; repeat around, sl st to join.
Round 4:
Sl st to corner sp, (3 dc, ch 2, 3 dc) in corner, ch 1, 3 dc in next ch-1 sp, ch 1; repeat around, sl st to join.
Fasten off Color B.
Switch to Color A
Round 5: Repeat Round 4. Fasten off.
Switch back to Color B
Round 6: Repeat Round 4.
Round 7:
Sl st to corner sp, (ch 3, dc in next ch-1 sp, 5 dc around the post of the last dc made, sc in next ch-1 sp) repeat 19 times to next corner, ch 4, sc in corner; repeat around, sl st to join.
Fasten off and weave in all ends.
Final Thoughts
The Bear Blanket Crochet Pattern brings together charm, texture, and practicality in one delightful project. With its sweet animal faces and soft, decorative border, this blanket is sure to be cherished for years. Whether you’re gifting it to a loved one or keeping it for your own little one, it’s a handmade piece guaranteed to bring warmth and smiles.