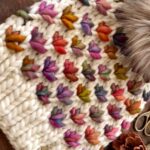
Ready to learn a crochet technique that’s both simple and beautiful? The Super Easy Tunisian Crochet Stitch is perfect for beginners as well as experienced crocheters looking for a relaxing, textured stitch. It creates a lovely, soft fabric ideal for blankets, baby clothes, scarves, and decorative projects.
In this guide, I’ll walk you through the stitch step by step so you can master it with confidence.
What You’ll Need
Before getting started, gather the following supplies:
-
Yarn: You can use any yarn, but medium-weight yarn works best for learning. In this tutorial, Himalaya and Kartopu yarns were used.
-
Tunisian Crochet Hook: A size 3 mm hook is recommended here, but feel free to adjust the size depending on your yarn and tension.
Step-by-Step Instructions
Step 1: Make Your Foundation Chains
-
Start with a slipknot and place it on your hook.
-
Crochet a foundation chain to your desired width.
Keep your chains loose—this will make the next steps much easier.
Tip: For a practice swatch, chain around 20 stitches.
Step 2: First Forward Pass (Picking Up Loops)
-
Insert your hook into the second chain from the hook.
-
Yarn over and pull up a loop.
-
Continue doing this across the entire chain.
By the end of this step, you will have many loops sitting on your hook—this is normal for Tunisian crochet.
Step 3: Return Pass
-
Yarn over and pull through two loops.
-
Repeat this all the way across until only one loop remains on your hook.
This completes your return pass and resets your hook for the next row.
Step 4: Optional – Changing Colors
Want to add color changes or striping?
-
Stop when you reach the last two loops of your return pass.
-
Attach your new color and pull through those final loops using the new yarn.
If you prefer secure color changes, you can tie a small knot before continuing.
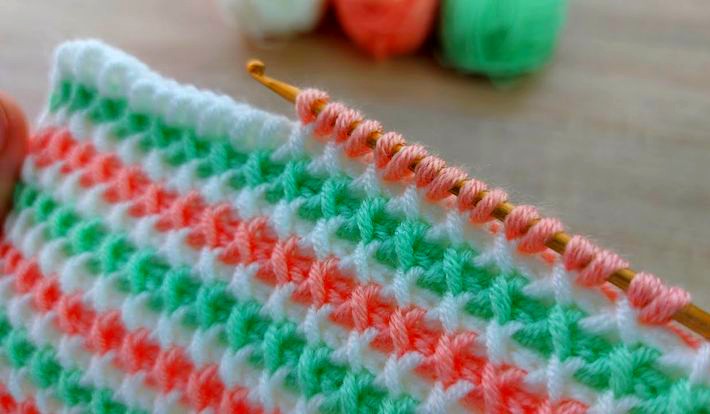
Step 5: Second Row – Creating the Texture
-
Insert your hook under two vertical loops at once.
-
Yarn over, pull through both loops, and gently stretch the stitch.
-
Go back to the first loop on your hook and pull through to complete the stitch.
Repeat this process across the row to build the gorgeous textured pattern this stitch is known for.
Step 6: Creating Neat Edges
At the end of each row, make sure to work through both strands of the edge stitch.
This helps maintain a clean, structured border with no curling.
Step 7: Crossed Stitch Variation
To add extra depth and visual interest:
-
Every third row, begin with two simple Tunisian stitches.
-
Then continue working into pairs of loops as usual.
This creates a subtle crossed-stitch effect that enhances the texture beautifully.
Finishing Your Work
When your piece reaches the desired length:
-
Bind off by working a single crochet stitch across the last row.
-
Weave in all ends with a yarn needle for a clean, professional finish.
Video Tutorial
The Super Easy Tunisian Crochet Stitch is versatile, beginner-friendly, and produces a fabric with wonderful texture and durability. Whether you’re making a cozy baby blanket, a warm scarf, or a decorative pillow, this stitch will give your project a polished, eye-catching look.