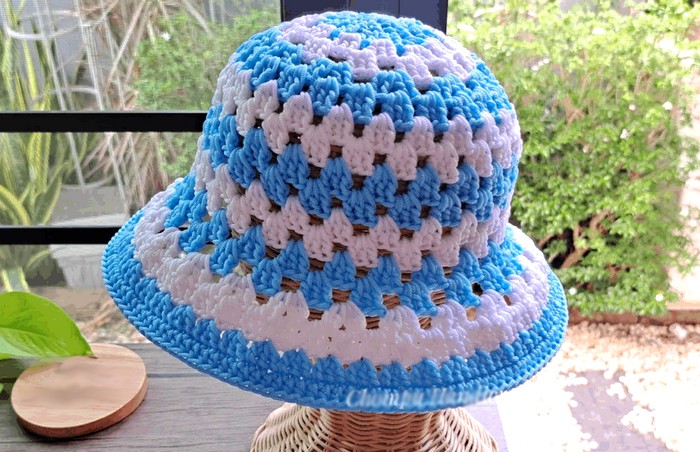
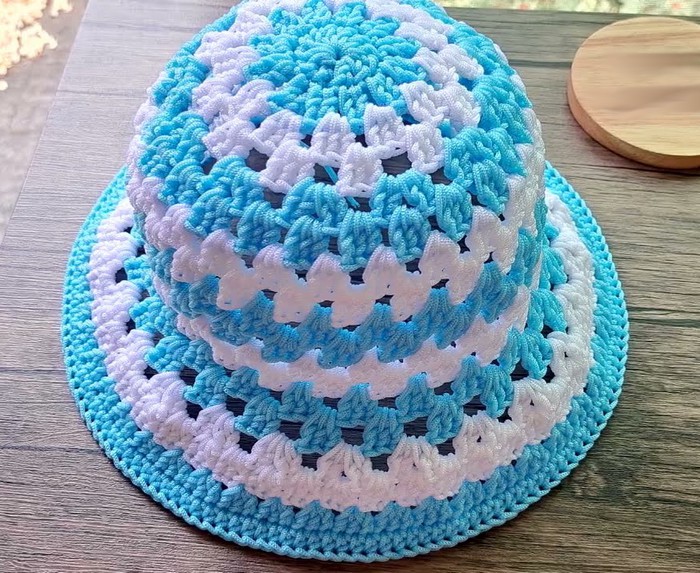
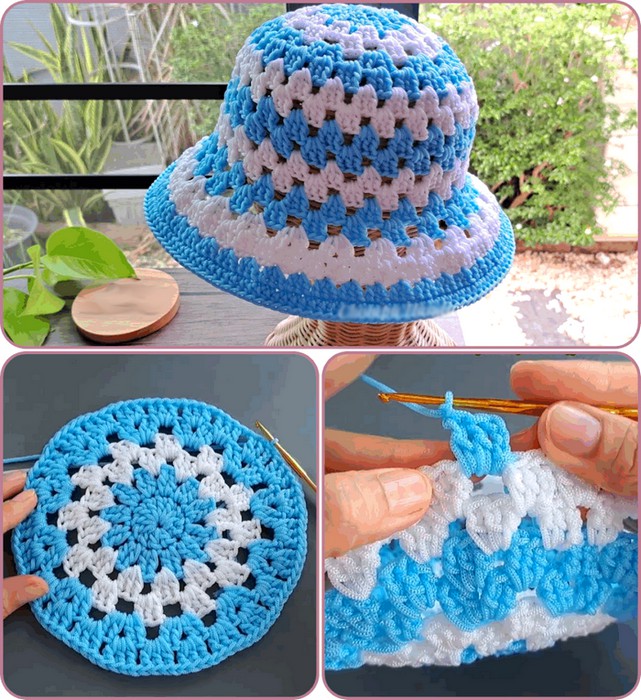
Crochet Sun Hat: A Beginner-Friendly Guide
If you’re looking for a fun, functional, and fashionable crochet project, this sun hat is a perfect choice. Designed with simplicity in mind, it’s ideal for advanced beginners or intermediate crocheters ready to practise some classic stitches. Whether you’re gearing up for summer or just in the mood for a breezy weekend make, this tutorial will walk you through every step.
What You’ll Need
-
Cotton yarn (DK or lightweight): around 100–150g
-
Crochet hook: 3.5mm to 4.5mm (depending on your yarn label)
-
Stitch markers (helpful for keeping track)
-
Scissors
-
Yarn needle for weaving in ends
-
(Optional) Wire or interfacing if you want a stiffer brim
Stitch Guide (Using US Terms)
-
ch – chain
-
sc – single crochet
-
hdc – half double crochet
-
dc – double crochet
-
sl st – slip stitch
-
st(s) – stitch(es)
-
inc – increase (2 stitches in the same space)
Let’s Get Started!
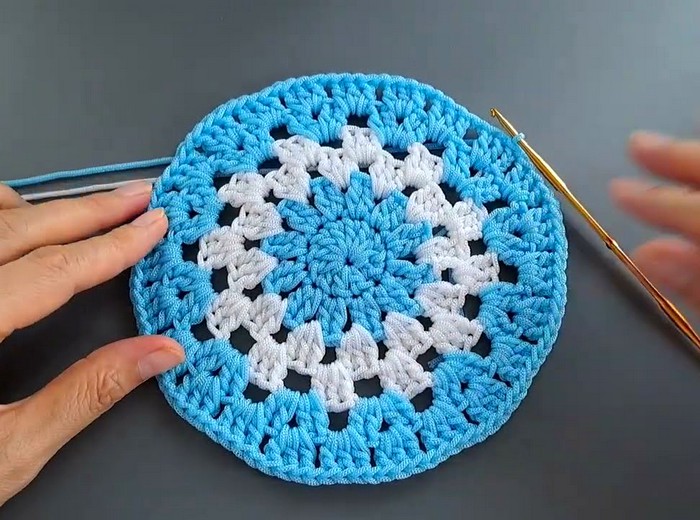
1. The Crown (Top of the Hat)
We’ll begin with a magic ring, working in the round to form the crown.
-
Round 1: Create a magic ring. Chain 2 (counts as your first dc), then crochet 11 double crochets into the ring. Slip stitch to the top of the chain-2. (12 dc total)
-
Round 2: Chain 2, work 2 dc in each stitch around. Join with a slip stitch. (24 dc)
-
Round 3: Chain 2. (1 dc in next stitch, 2 dc in the following stitch) — repeat all the way around. Join. (36 dc)
-
Round 4: Chain 2. (1 dc in next 2 stitches, 2 dc in the next) — repeat around. (48 dc)
-
Rounds 5–7: Keep increasing in the same way: adding one more single dc between each increase every round. Stop when your circle is roughly 6.5 inches (16.5 cm) wide — perfect for an adult size.
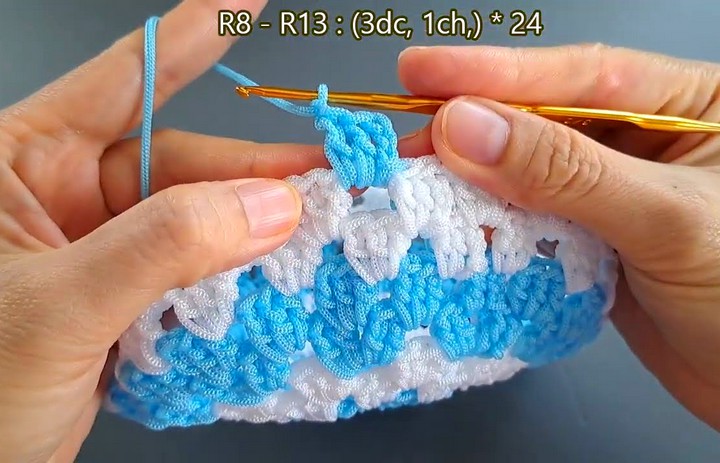
2. The Sides (Hat Body)
Now that the top’s sorted, it’s time to build the sides.
-
Rounds 8–15 (or until you’re happy with the height):
Chain 2 and double crochet evenly around — no more increases here. Slip stitch to join each round.
Tip: Want a snugger fit? You can switch to half double crochet (hdc) or single crochet (sc) for a denser texture.
3. The Brim
Time to give that hat a bit of flair!
-
Round 16: (1 dc in next 3 stitches, 2 dc in the next) — repeat all the way round.
-
Round 17: (1 dc in next 4 stitches, 2 dc in the next) — repeat around.
-
Round 18: Dc in every stitch with no increases.
At this point, feel free to stop or keep going. The more rounds you add, the wider your brim will be. If you’d like extra stiffness, you can slip in wire or sew interfacing into the edge.
Finishing Touches
-
Fasten off and weave in all loose ends neatly with your yarn needle.
-
To give your hat its final shape, lightly block it using steam or a gentle wet block.
-
Add a ribbon, bow, or crochet tie for that finishing flair — or keep it plain and classy.
Want a Video Tutorial?
If you’d like, I can also find a YouTube video tutorial for a crochet sun hat. Would you like me to do that?
Let me know if you want a child-size version or something more decorative!
Video tutorial: