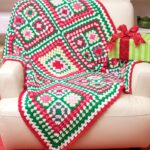
The Sunburst Granny Square is a gorgeous and adaptable crochet design that can bring life to a wide range of projects. Whether you’re making a cozy blanket, vibrant cushion covers, stylish bags, or even scarves, this radiant pattern resembles the warmth and beauty of the sun. Its circular sunflower-like design adds energy and brightness, making it a favorite for crochet lovers who want to add a personal touch to their creations.
This tutorial will guide you step-by-step on how to create your own Sunburst Granny Square and offer ideas on how to use it in your projects.
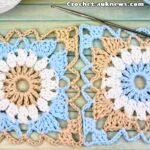
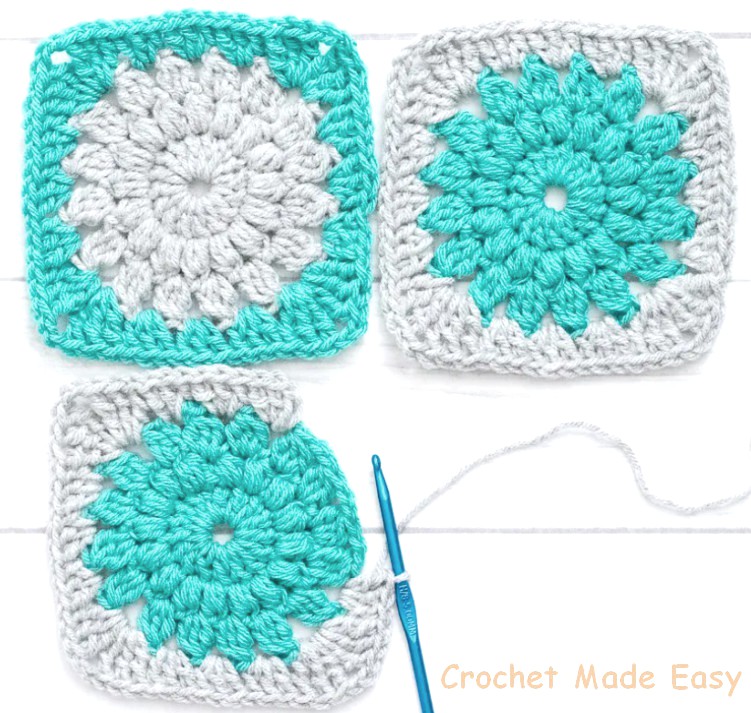
Unlike the traditional granny square, the Sunburst Granny Square features an intricate circular motif that radiates like sunshine. It’s the perfect choice for bringing texture and color into your projects. You can customize it with bold, vibrant shades or use soft and subtle tones for a more classic look. Whether you stick to one color or mix several, this design is a blank canvas for endless creativity.
Project Ideas for Sunburst Granny Squares
The versatility of this pattern makes it ideal for countless crochet projects. Here are some inspiring ideas:
-
Blankets and Afghans
Stitch together multiple squares to create a stunning blanket or throw. By playing with colors, you can easily match it with the decor of any room. -
Pillows and Cushion Covers
Transform your living space with radiant crochet pillow covers. They’re guaranteed to bring warmth and charm to any area. -
Bags and Totes
Use Sunburst Granny Squares to design unique handmade bags or totes. They’re great for personal use or as thoughtful gifts.
Materials You’ll Need
Before you begin, gather these essential materials:
- Yarn in your chosen colors
- A crochet hook suitable for your yarn (refer to your yarn label)
- Scissors
- A yarn needle for weaving in loose ends
Once you have these tools ready, it’s time to get started!
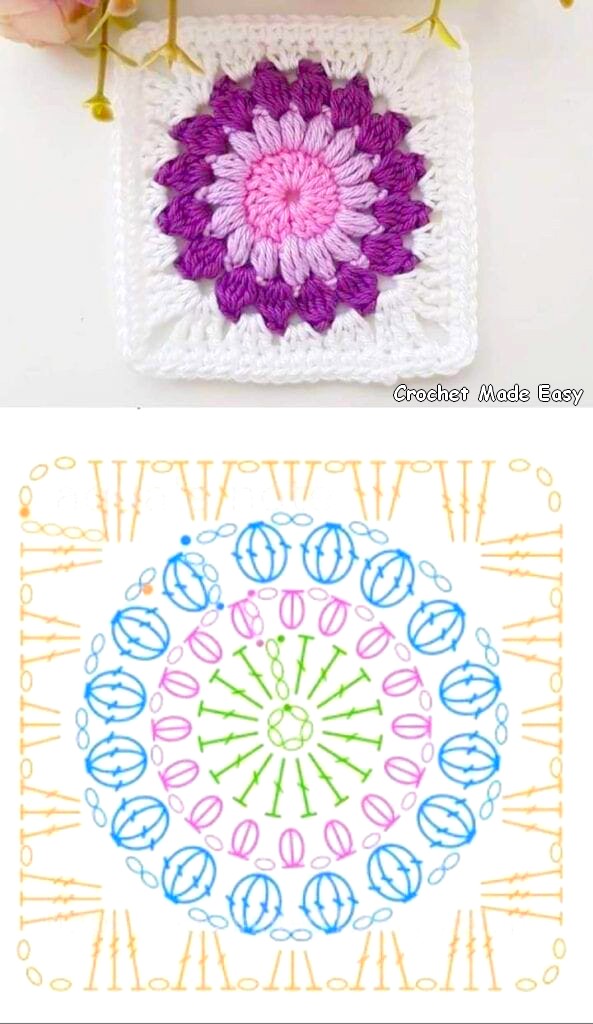
How to Crochet the Sunburst Granny Square
Starting Your Square
Begin by creating a base. You can start with a magic ring or chain four stitches and then join them into a circle with a slip stitch.
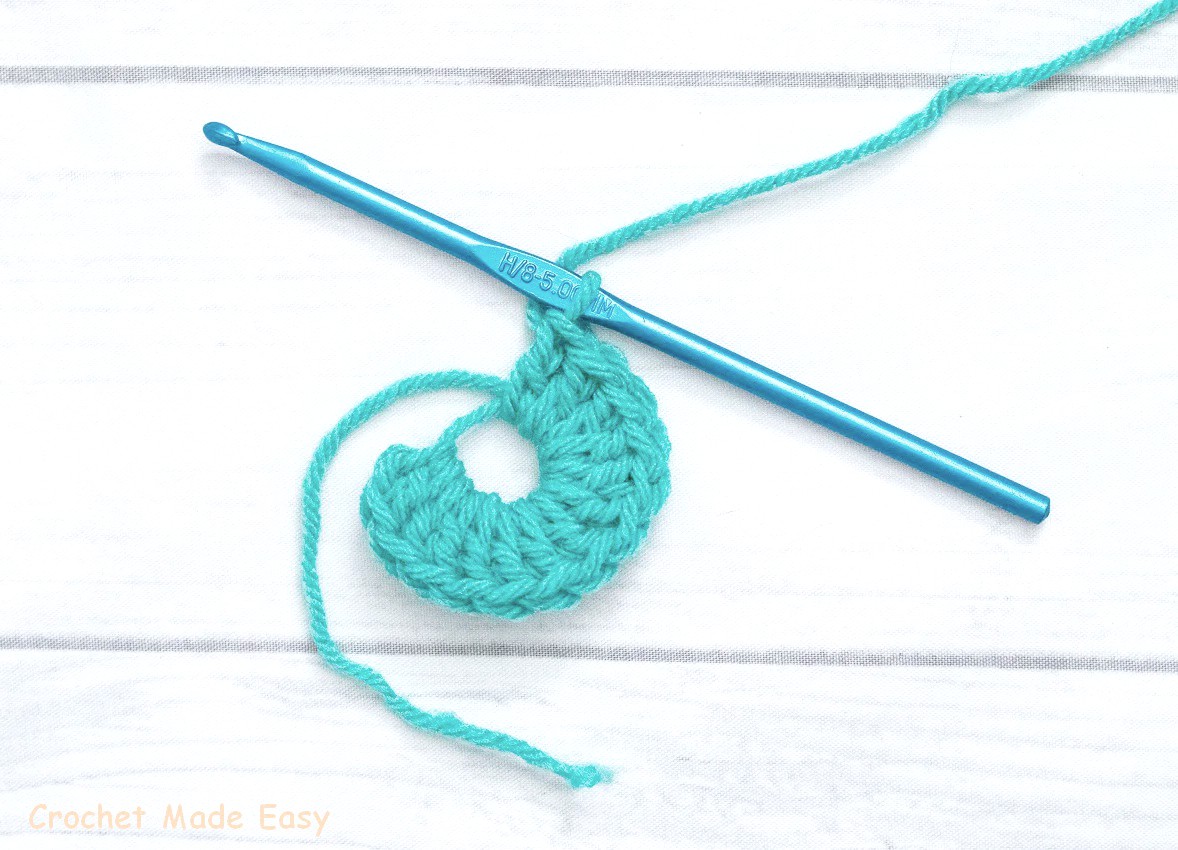
Round 1
- Chain 2 to count as your first double crochet.
- Work 15 double crochets into the center of the ring.
- Join with a slip stitch to the top of the starting chain. (You’ll have 16 stitches in total.)
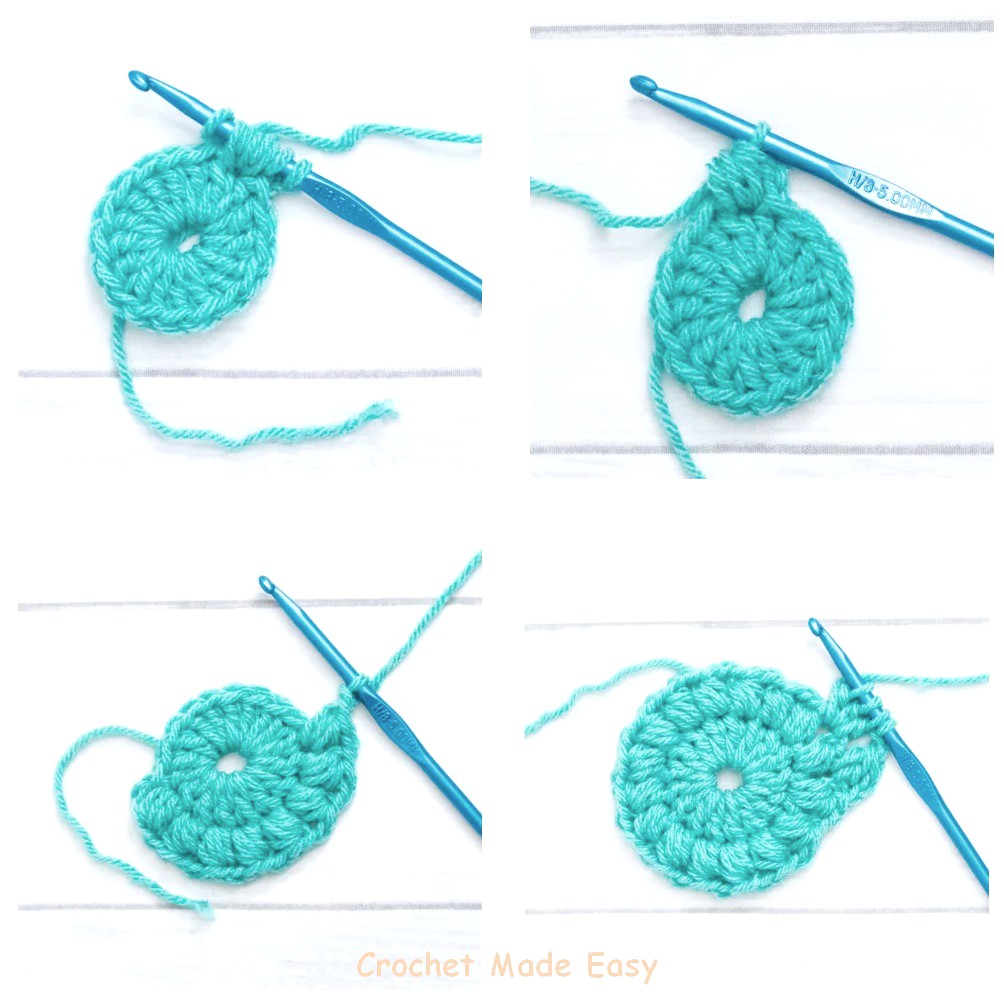
Round 2
- Start with a chain of 2.
- Work a puff stitch into the first double crochet, followed by a chain of 1.
- Repeat the puff stitch and chain 1 sequence 15 more times.
- Join with a slip stitch to close the round. (You’ll end up with 16 puff stitches.)
How to Crochet a Puff Stitch:
- Yarn over, insert the hook into the stitch, and pull up a loop.
- Repeat this process three times (you’ll have 7 loops on your hook).
- Yarn over again and pull through all 7 loops to complete the stitch.
- Secure with a chain.
Round 3
- Chain 2 (counts as the first double crochet).
- Work a dc2tog (double crochet two together) in the chain space between any two puff stitches. Follow this with a chain of 1.
- Continue with dc3tog (double crochet three together) in the next chain space, followed by a chain of 1.
- Repeat this pattern around the circle until you have 16 clusters.
- Join with a slip stitch to complete the round.
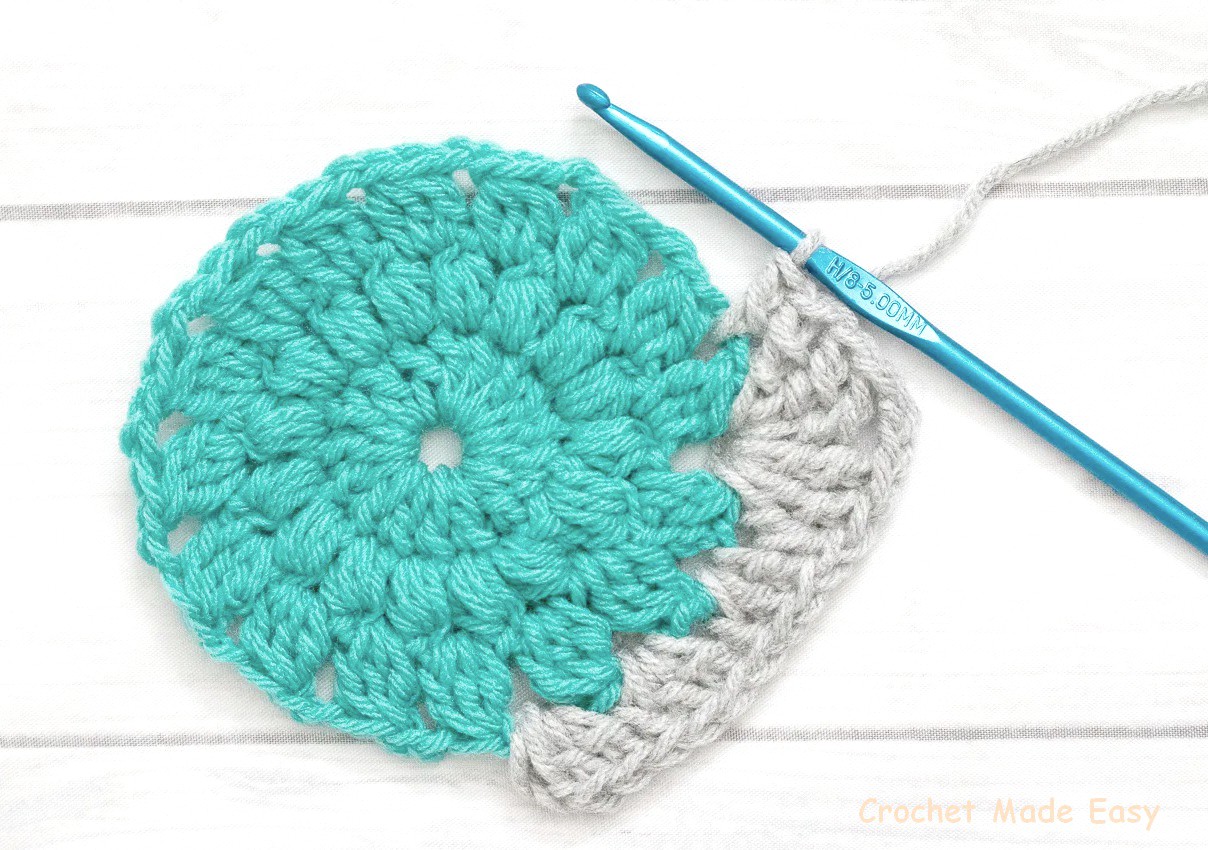
Round 4 (Adding the Border)
- Attach a new border color in any chain space between the dc3tog clusters.
- Begin with a chain of 2 (which counts as the first double crochet).
- Work 2 double crochets into the same chain space. This creates your first group of 3 double crochets.
- Move to the next two chain spaces and crochet 3 double crochets into each one.
- To form a corner, work 3 triple crochets, chain 2, then another 3 triple crochets into the next chain space.
- Repeat this sequence around the square, forming 4 corners with groups of 3 double crochets in between.
- Finish by joining to the starting chain with a slip stitch.
Expanding Your Square
If you want to make your square larger, you can continue adding rounds. Simply follow the same pattern, increasing the set of 3 double crochets along each side with every new round.
Finishing Touch
Once done, cut the yarn, weave in all loose ends with a yarn needle, and admire your gorgeous Sunburst Granny Square.
Create More and Experiment with Colors
Congratulations! You’ve completed a Sunburst Granny Square. Now you can experiment with different colors and patterns to make more of them. Stitch them together for larger projects or mix them with other motifs for a charming patchwork effect. From blankets to accessories, the Sunburst Granny Square turns ordinary items into something truly special. Enjoy the process and have fun with your creative designs!
Access the PDF/ Pattern Download PDF Free
Video Tutorial
Dear crocheter friend, if you learn faster by watching this pattern on video, we recommend the tutorial from the Blossom Crochet channel.
Happy crocheting!
Dear crochet lovers,
Do you enjoy browsing social media for beautiful crochet patterns and creative inspiration? 🧶✨
Check out our Facebook page, where we share stunning designs, fresh ideas, and endless crochet inspiration! Whether you’re a beginner or an expert, you’ll find something to spark your creativity. 💖
🌿 Visit us here: Crochet Made Easy