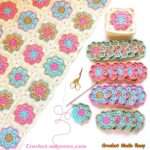
How to Crochet a Cozy Stripe Blanket
There’s a special charm to handmade blankets. They’re snug, full of love, and carry the warmth of someone’s time and effort. Among the many options for crochet enthusiasts, the cozy stripe blanket stands out as a delightful mix of style, color, and simplicity. Whether you’re a seasoned crocheter or just starting your yarn adventure, this project is a fantastic way to unwind while creating something beautiful and practical.
From the satisfying rhythm of hooking yarn to the creative freedom of selecting colors, crocheting a cozy stripe blanket is a relaxing hobby that offers plenty of room for personal expression. Plus, at the end, you’re left with a soft, comforting treasure to add warmth to your home or to gift to someone special.
Why Crochet a Cozy Stripe Blanket?
Crocheting isn’t just about making things—it’s an act of self-care. It helps you slow down, stay present, and engage your mind and hands in a fulfilling activity. A stripe blanket, in particular, is a beginner-friendly project that also appeals to experienced crocheters. It balances simplicity and creativity with its straightforward rows and the possibility of endless color combinations.
What’s more, this project puts you in control. You get to decide on the size, the color palette, and even the type of yarn you use. No two stripe blankets are the same, and that’s the beauty of making something handmade!
Step-by-Step Guide to Crocheting a Cozy Stripe Blanket
Are you ready to start crocheting your own stripe blanket? Here’s a simple guide to help you get started.
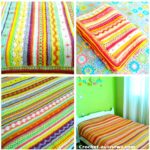
Cozy Stripe Blanket
Striped Crochet Blanket Pattern (Single Bed Size)
This pattern will guide you step-by-step to create a beautiful striped crochet blanket with a width of 120cm, suitable for a single bed. The design alternates between rows of plain trebles and treble clusters, creating a simple yet striking texture. Let’s get started!
Getting Started
- You’ll start with a foundation chain.
- The stitch count and edges are crucial, so pay attention to instructions—I’ll walk you through it all!
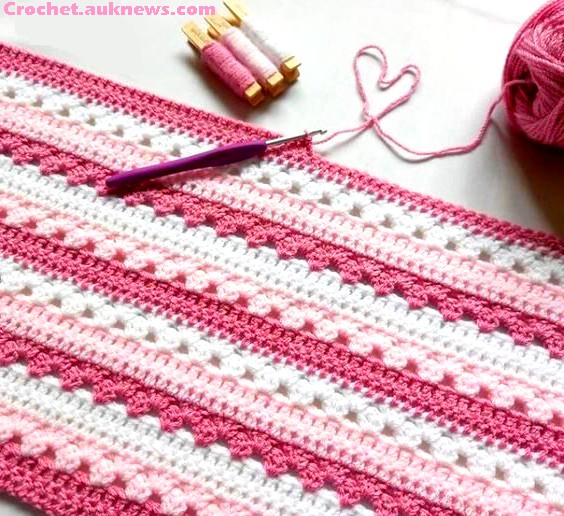
ROW 1
- Begin by chaining 198 stitches.
- Work a treble crochet (tr) into the 4th chain from the hook (this stitch is indicated by your needle in the reference image).
- Continue crocheting 1 treble into each chain across the row. When counting the turning chain as your first stitch, you should end up with 196 stitches in total.
- To prepare for the next row, chain 3 (this counts as your first treble for Row 2) and turn your work.
ROW 2
Note: When working treble crochet rows, ignore the stitch at the base of your turning chain. Your first treble should go into the stitch immediately after it.
- Work 1 treble crochet into each stitch across the row.
- When you get to the end, be sure to finish by crocheting into the top of the chain-3 from the row below—it’s easy to miss, so double-check.
- You should still have 196 stitches in this row.
- After completing this row, fasten off, leaving a 15cm tail to weave in later.
ROW 3
Note: For odd-numbered rows, you’ll change colors at the start. Alternate colors every odd row for a vibrant stripe effect.
- Insert your hook into the first stitch, pull through your new color, and secure it.
- Chain 3 (this counts as 1 treble), then work another treble into the same stitch.
- Skip the next 2 stitches, then crochet 3 trebles into the next stitch.
- Repeat this sequence (skip 2 stitches, then work 3 trebles into the next stitch) across the row until 3 stitches remain.
- Skip 2 stitches, then work 2 trebles into the final stitch (the top of the chain-3 from the row below).
- Chain 3 and turn. Your count for this row should be:
- 2 trebles + (3 trebles x 64 clusters) + 2 trebles
ROW 4
Note: For this row, you’ll be working your trebles into the spaces between the treble clusters from the previous row.
- Crochet 3 trebles into the first space between clusters.
- Continue working 3 trebles into each space along the row.
- When you reach the end, finish by working 1 treble into the top of the last stitch.
- Fasten off, leaving a 15cm tail for weaving in later. Your count for this row should be:
- 1 treble + (3 trebles x 65 clusters) + 1 treble
ROW 5
Note: Change colors again for this row.
- Insert your hook into the first stitch, pull through your new yarn, and chain 3 (this counts as 1 treble).
- Work a treble stitch into each stitch across, but do not work into the very last stitch.
- Remember to skip that final stitch! This step ensures your stitch count stays consistent.
- Counting the chain-3 as your first stitch, there should be 196 stitches in total.
- Chain 3 and turn.
ROW 6
- Ignore the stitch at the base of your chain-3, and begin your first treble in the next stitch.
- Work 1 treble crochet into each stitch across the row.
- At the end, make sure to finish with a treble into the top of the chain-3 from the row below.
- You should have 196 stitches in total.
- Fasten off, leaving a 15cm tail for later.
ROW 7
Note: Switch to a new color.
- Start by pulling your new yarn through the first stitch and chaining 3 (this counts as 1 treble). Work another treble into the same stitch.
- Skip 2 stitches, then crochet 3 trebles into the next stitch.
- Repeat this sequence (skip 2 stitches, then work 3 trebles into the next stitch) until 3 stitches remain.
- Skip the next 2 stitches, and finish the row with 2 trebles in the last stitch.
- Do not fasten off—just turn your work for the next row.
ROW 8
Note: You’ll be working into the spaces between the treble clusters for this row.
- Chain 3 (this counts as 1 treble), then crochet 3 trebles into the first space.
- Work 3 trebles into each space along the row.
- End with a treble in the top of the last stitch and fasten off, leaving a 15cm tail.
ROW 9
Note: Change colors again for this row.
- Insert your hook into the first stitch, pull through your new yarn, and chain 3 (this counts as 1 treble).
- Crochet 1 treble into each stitch, but as you near the end, skip the final stitch, just like in Row 5.
- Chain 3 and do not fasten off.
ROW 10
- Ignore the stitch at the base of your turning chain, and begin your first treble in the next stitch.
- Work 1 treble into each stitch across the row, finishing with a treble into the top of the chain-3 from the previous row.
- Fasten off, leaving a tail.
Forming the Pattern
At this point, the stripe pattern will start to emerge. Each color forms two rows:
- One stripe of plain trebles (Rows 5–6, 9–10, and so on).
- One stripe of treble clusters (Rows 3–4, 7–8, and so on).
Repeats
From here, repeat these row instructions:
- Row 11 = Follow Row 7 (Treble Clusters, odd row)
- Row 12 = Follow Row 8 (Treble Clusters, even row)
- Row 13 = Follow Row 9 (Plain Trebles, odd row)
- Row 14 = Follow Row 10 (Plain Trebles, even row)
Important Reminder
Always skip the final stitch in odd-numbered plain treble rows (like Row 5 and Row 9). This keeps your edges straight and ensures consistent stitch counts—always 196 stitches per row.
Final Thoughts
This pattern is straightforward once you’ve worked through a few rows, and the alternating stripes create a beautiful, textured look. Enjoy the process, and have fun experimenting with colors!
Download the free Cozy Stripe Crochet Pattern here!
Tutorial Video
This tutorial video from channel Bella Coco
Dear crochet lovers,
Do you enjoy browsing social media for beautiful crochet patterns and creative inspiration? 🧶✨
Check out our Facebook page, where we share stunning designs, fresh ideas, and endless crochet inspiration! Whether you’re a beginner or an expert, you’ll find something to spark your creativity. 💖
🌿 Visit us here: Crochet Made Easy