Elegant and Timeless Crochet Blanket Pattern
If you appreciate the beauty of classic and sophisticated crochet blankets, this pattern is just for you! Handmade blankets bring warmth, comfort, and a unique charm to any space—something that only handcrafted pieces can truly offer.
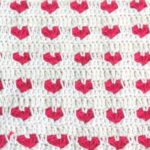
This step-by-step tutorial will guide you through creating a stunning crochet blanket, featuring a mix of different square patterns and textures. The elegant combination of white and mustard yellow adds a touch of refinement and cosiness, making it a perfect addition to any home.
Beyond being a rewarding creative project, crocheting this blanket is a fantastic way to enhance your skills. Whether you’re crafting it as a heartfelt gift or a decorative piece for your home, this pattern will help you create something truly special. Let’s begin!

Classic Crochet Blanket
Materials You’ll Need
-
Medium-weight cotton or acrylic yarn in white and mustard yellow
-
A crochet hook suited to your yarn (4mm or 4.5mm recommended)
-
Scissors
-
A tapestry needle for weaving in loose ends
Types of Squares Used
This blanket is made up of three different crochet square designs:
-
Simple Textured Square – Created using single or half-double crochet stitches
-
Classic Granny Square – Made with groups of three double crochet stitches
Simple Textured Square Pattern
-
Start with a foundation chain of 25 stitches.
-
Work single crochet (or half-double crochet) into the second chain from the hook and continue across the row.
-
Turn your work, chain one (for single crochet) or chain two (for half-double crochet), and repeat until you have a square shape.
-
Cut the yarn and fasten off securely.
Classic Granny Square Pattern
-
Begin with a magic ring and chain three (this counts as your first double crochet).
-
Work two double crochet stitches into the ring, followed by two chain stitches.
-
Repeat this pattern of “three double crochets + two chain stitches” three more times.
-
Pull the magic ring tight and join with a slip stitch into the third chain of your starting chain.
-
Continue working in rounds, placing three double crochets into each space and using two chains to separate the corners.
-
Keep going until the square reaches the desired size.
Assembling the Blanket
-
Lay out your squares on a flat surface and arrange them in a pattern you like.
-
Use the invisible seam method with a tapestry needle, or join the squares with crochet stitches.
-
First, sew the squares into individual rows, then join the rows together.
Adding a Decorative Border
-
Work a round of single crochet stitches around the entire blanket to create a clean edge.
-
For a stylish touch, try a “one double crochet, skip one stitch, one single crochet” pattern to create a subtle wavy effect.
-
Finish with a delicate crochet edging for a polished and elegant look.
Final Tips for a Flawless Finish
-
Blocking your squares before assembling will ensure a neater and more even final result.
-
Using high-quality yarn enhances durability and softness.
-
Experiment with different colour combinations to personalise your design.
Now, grab your crochet hook and start crafting this beautiful and timeless blanket! Happy crocheting!
Dear crochet lovers,
Do you enjoy browsing social media for beautiful crochet patterns and creative inspiration? 🧶✨
Check out our Facebook page, where we share stunning designs, fresh ideas, and endless crochet inspiration! Whether you’re a beginner or an expert, you’ll find something to spark your creativity. 💖
🌿 Visit us here: Crochet Made Easy
See also: Square Crochet Blanket | Patterns Stitchs
See also: Chevron stitch in crochet
See also: Crochet Flower Brooch Free Pattern