Crystal Wave Crochet Baby Blanket Pattern
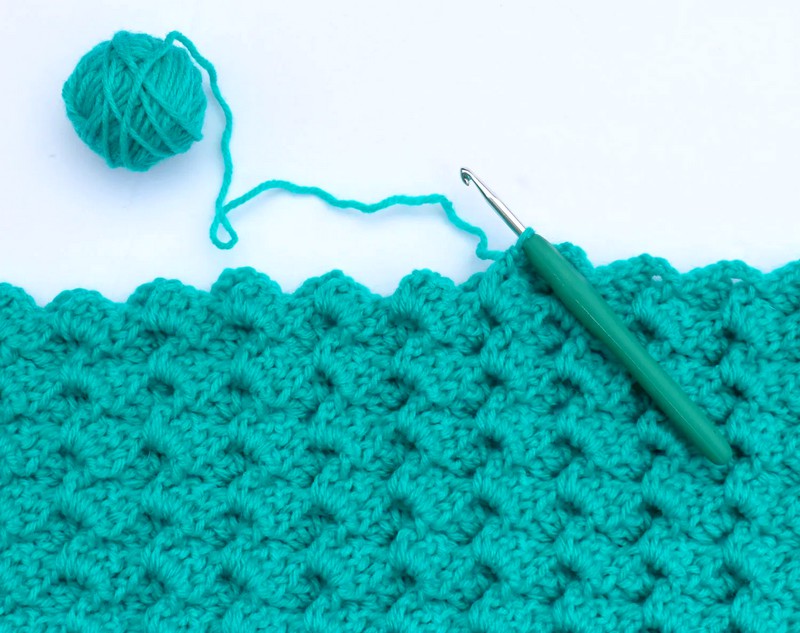
I’m always looking for fresh inspiration when it comes to baby blankets, and today, I’m excited to share a Crystal Wave Crochet Baby Blanket tutorial with you. This pattern is simple yet elegant, making it a great project for both beginners and experienced crocheters.

Choosing a Design Strategy
When making a baby blanket, I like to keep things simple with solid colours or stripes while using an interesting stitch to add texture and visual appeal. Baby blankets are the perfect opportunity to try out a new stitch—they’re small enough to experiment with but not so large that they take forever to complete.
The Crystal Wave Crochet Stitch is a beginner-friendly pattern that only requires basic stitches:
-
Double Crochet (DC)
-
Single Crochet (SC)
-
Chain Stitch (CH)
-
Front Post Single Crochet (FPSC)
Because this stitch is worked in groups of four stitches, your starting chain should always be a multiple of 4 to ensure the pattern works correctly.
Adjusting the Blanket Size
For this project, I wanted my baby blanket to be 32 inches wide. To achieve this, I chained until I reached that width, then counted the stitches and adjusted to ensure my final count was a multiple of 4. You can easily customise the size—just make sure your final chain can be evenly divided by 4.
Materials Needed
-
Yarn: Category 4 (medium-weight) yarn
-
Hook: 4.5 mm crochet hook
-
Scissors
-
Tapestry needle (for weaving in ends)
Crystal Wave Crochet Baby Blanket Pattern
Foundation Chain:
Chain 128 (or any multiple of 4, depending on your preferred width).
Row 1:
-
DC in the 4th chain from the hook (counts as two DC in the same stitch).
-
Skip 3 chain stitches, SC in the next chain. CH 3, then work 3 DC into the same chain stitch as the SC.
-
Repeat (Skip 3 stitches, SC in the next chain, CH 3, 3 DC in the same chain as the SC) across the row.
-
End with an SC in the last stitch. CH 3 and turn.
Row 2:
-
Work 2 DC in the SC from the end of Row 1.
-
FPSC around the third DC in the set of 3 DCs from the previous row. CH 3, then work 3 DC into the CH-3 space from the previous row.
-
Repeat from * to * until you reach the end of the row.
-
Finish with an SC in the CH-3 space from the previous row. CH 3 and turn.
Repeat Row 2 until your blanket reaches the desired length.
TUTORIAL VIDEO
Here is a video demonstrating the crystal wave crochet stitch frrom channel West Coast Mom
Finishing the Blanket
One of the best things about this pattern is that it doesn’t require a border—the edges naturally look neat and polished. Because of this, I chose to leave my blanket as it was, but you can always add a decorative edge if you prefer.
This is a fantastic project to work on while multitasking—whether you’re on the go, watching TV, or even sitting through a Zoom meeting! Once you get into the rhythm of the pattern, it becomes almost second nature, allowing you to crochet without constantly referring to the instructions.
Would you like any additional tips or modifications for this pattern? 😊
Dear crochet lovers,
Do you enjoy browsing social media for beautiful crochet patterns and creative inspiration? 🧶✨
Check out our Facebook page, where we share stunning designs, fresh ideas, and endless crochet inspiration! Whether you’re a beginner or an expert, you’ll find something to spark your creativity. 💖
🌿 Visit us here: Crochet Made Easy
See also: Crystal Wave Crochet Baby Blanket Pattern
See also: Zig Zag Puff Stitch Crochet
See also: Willow Granny Square Pattern Free
Happy crocheting!


